This step by step guide will help you to safely Root Samsung Galaxy A3 SM-A300FU running Android 4.4.4 KitKat having build number KTU84P.A300FUXXU1ANL4.In this guide, we will use Odin tool and a Windows PC.So if you want to get root on your Galaxy A3 A300FU Follow the tutorial below on How to Root Samsung Galaxy A3 SM-A300FU
This only for Samsung Galaxy A3 SM-A300FU model running Android KitKat 4.4.4.So first of all, check your model number and android version.
For Galaxy A3 4G Duos visit this tutorial Guide–>> How To Root Samsung Galaxy A3 4G Duos SM-A300M
Related Guide
- Download & Install Odin (Jdoin3) For MAC OSX
- Download odin v3.09 for pc (Direct Link)
- Download Odin 3.10 for free (latest Version)
Device that is supported
- This is only for Galaxy A3 SM-A300FU
- Check your model number don’t try this method on different variants
Warning:
rootmygalaxy.net will not be held responsible for any kind of damage occurred to your Galaxy A3 while following this tutorial.Do it at your own risk.
Follow the guide below to Safely Root Samsung Galaxy A3 SM-A300FU
Pre-Requirements
- Make sure your device has more than 40% battery
- Device Must be running on Kitkat
- Download and Install Samsung Drivers On your PC.Download Link->>Samsung Drivers
Now time to Root Samsung Galaxy A3 SM-A300FU –>>

Downloads
Root File (21.1MB)
How To Root Samsung Galaxy A3 SM-A300FU
Step By Step Guide
- First Of all check out Pre-requirements section
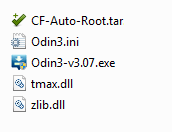
- Then download the root file from the download section above and extract them.Below is the image after extracting
- Now boot your device into download mode by following steps given below
Fist turnoff your device.Then Press and hold Volume Down, Home and Power button at same time for 5-8 seconds until download mode is active.
- Once in download mode, you will see a yellow warning triangle.Press the volume up key to continue
- Now open the Odin3 you have just extracted In step 2. (look small image of extracted file above)
- Now connect your Galaxy A3 to your PC
- Once your device is detected by Odin tool, click PDA and the select the CF-Auto-Root.tar file (you have extracted).

- Now click Start to begin the process
- The rooting / Flashing process may take up to 1min so don’t panic
- Once the process is completed you will be able to see a Green Box with Pass mark in Odin.
- Now disconnect your device.Now your device is fully rooted
- Go to the app drawer and now you can see SuperSu app there
- To verify the root status install Root Checker.
*During this process Smartphone will re-boot automatically.
