Hard West 2 is a fun, tactical turn-based RPG from Ice Code Games and Good Shepard Entertainment. The game is out for PC users through Steam and has been received positively by critics and players alike. Like many other games, there are some technical issues with the game, with the most common being Hard West 2 Keeps Crashing on Startup on PC. In this guide, you’ll get to know how you can easily fix that issue.
Page Contents
show
Method 1: Disable fullscreen optimizations
- Start by opening the Steam launcher and then clicking on Library
- Right-click on Hard West 2 and then click on Manage
- Choose Browse local files and then click on Hard West 2 installed location
- Right-click on HardWest2.exe and then select Properties
- Click on the Compatibility tab and then tick Disable fullscreen optimizations for enabling it
- Once it is done, click on Apply and then press OK to save changes

Method 2: Run the game file as an admin
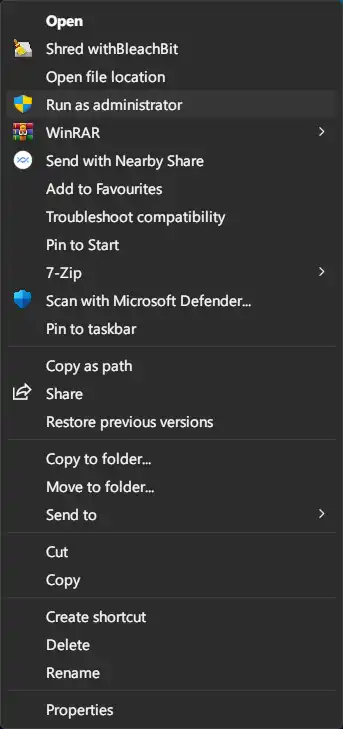
- Right-click on the Hard Wes 2 exe shortcut file on your computer
- Select Properties and go to the Compatibility tab
- Ensure that you’re clicking on the Run this program as an administrator checkbox for check-marking it
- Click on Apply and then select OK for saving changes
- You can now double-click on the game exe file to launch it
Method 3: End the background processes
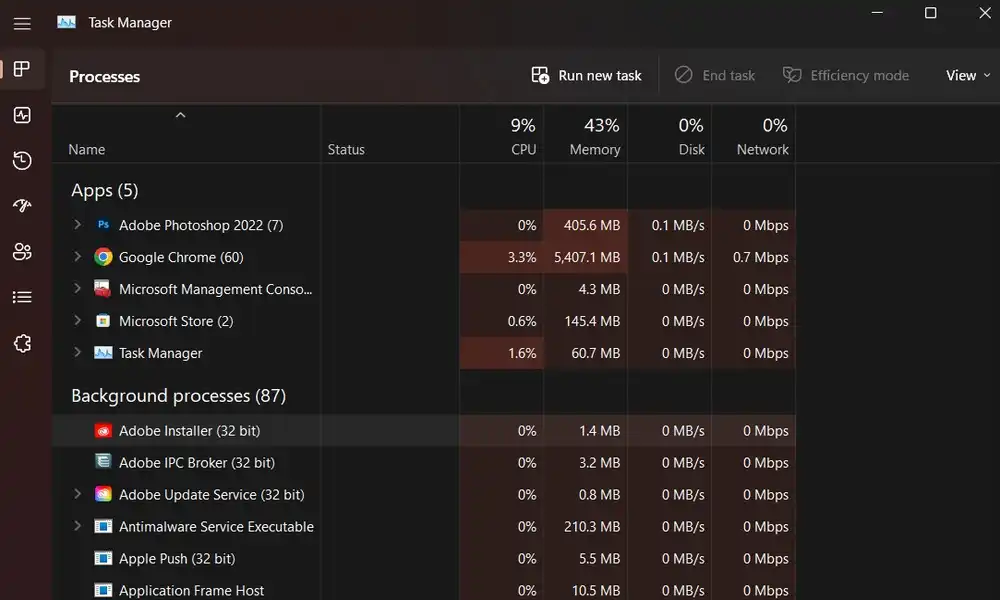
- Press Ctrl + Shift + Esc shortcut keys on the keyboard for opening Task Manager
- Click on the Processes tab and ensure that you’re selecting the task individually that you wish to close
- Click on the End Task for closing it
- Once it is done, close the Task Manager window and then restart your PC
Method 4: Update graphics drivers
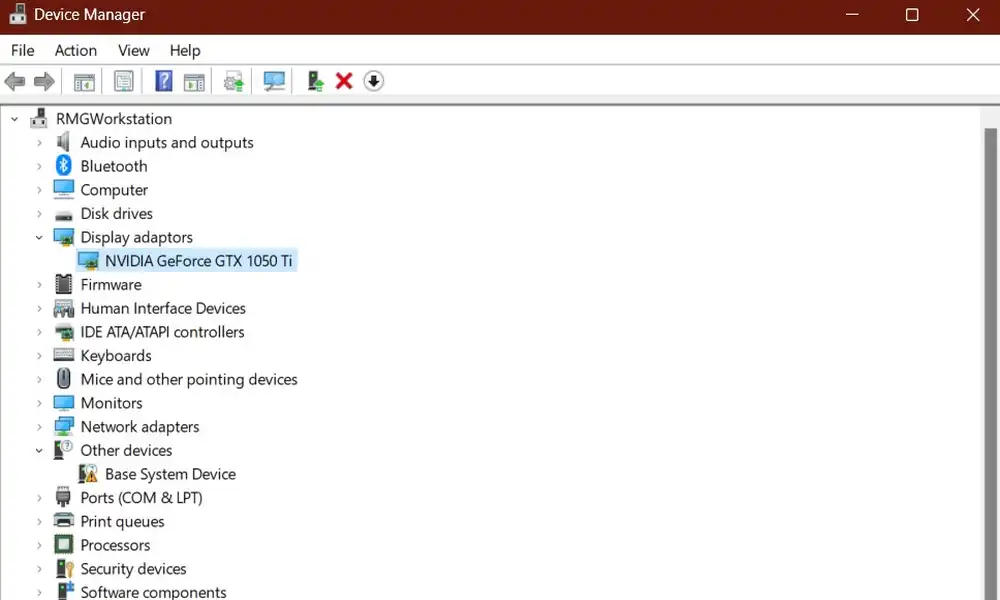
- Right-click on the Start Menu for opening up the Quick Access Menu
- Select Device Manager from the list for opening the interface
- Now, you’ll have to double-click on Display adapters for expanding it
- Right-click on the dedicated graphics card name that you’re using for bringing the context menu
- Click on the Update driver option and then choose Search automatically for drivers
- The system automatically checks for the available update
- Once it is done, ensure that you’re restarting your PC to apply the changes
Method 5: Check for any optional updates
- Press Windows + I keys for opening up the Windows Settings menu
- Click on the Windows Update from the left pane and then click on Advanced Options
- Scroll down slightly and find the Additional options section
- Click on Optional Updates and if there is any update available, ensure that you’re selecting the update
- Click on Download and Install and reopen the system once the update has been installed
Liked this post? Let us know on X (formerly Twitter) - we love your feedback! You can also follow us on Google News, and Telegram for more updates.
