You may have decided to install the stable Android 13 update or even a Beta update on your Google Pixel smartphone because you didn’t want to miss out on the Android 13 features. However, if you’re not having the best experience, you can always revert back to Android 12. If you encounter any major issues or you don’t like the latest update, you can return to the stable Android 12 firmware. In this guide, you’ll get to know the step-by-step method to do just that.
Prerequisites to Downgrade to Android 12 using the Bypass Anti Rollback method
Step 1: Bypass Anti Rollback on Google Pixel 6/6A/6 Pro
Google has recently introduced the Anti Rollback Protection for its Google Pixel 6 Series smartphones. If you’re looking to perform a downgrade from Android 13 to Android 12, you’ll need to bypass the Anti Rollback mechanism. It’s worth remembering that this feature will only work on Pixel 6 Series devices and won’t work for the Pixel 5 or Pixel 4 devices.
Step 2: Install Android SDK
First, you’ll need to install the Android SDK Platform-tools on your device. This is the ADB and Fastboot binary offered by Google and is the only recommended option. Download it and then extract it to a convenient location on your system. Doing this will give you the platform-tools folder, which you’ll be using.
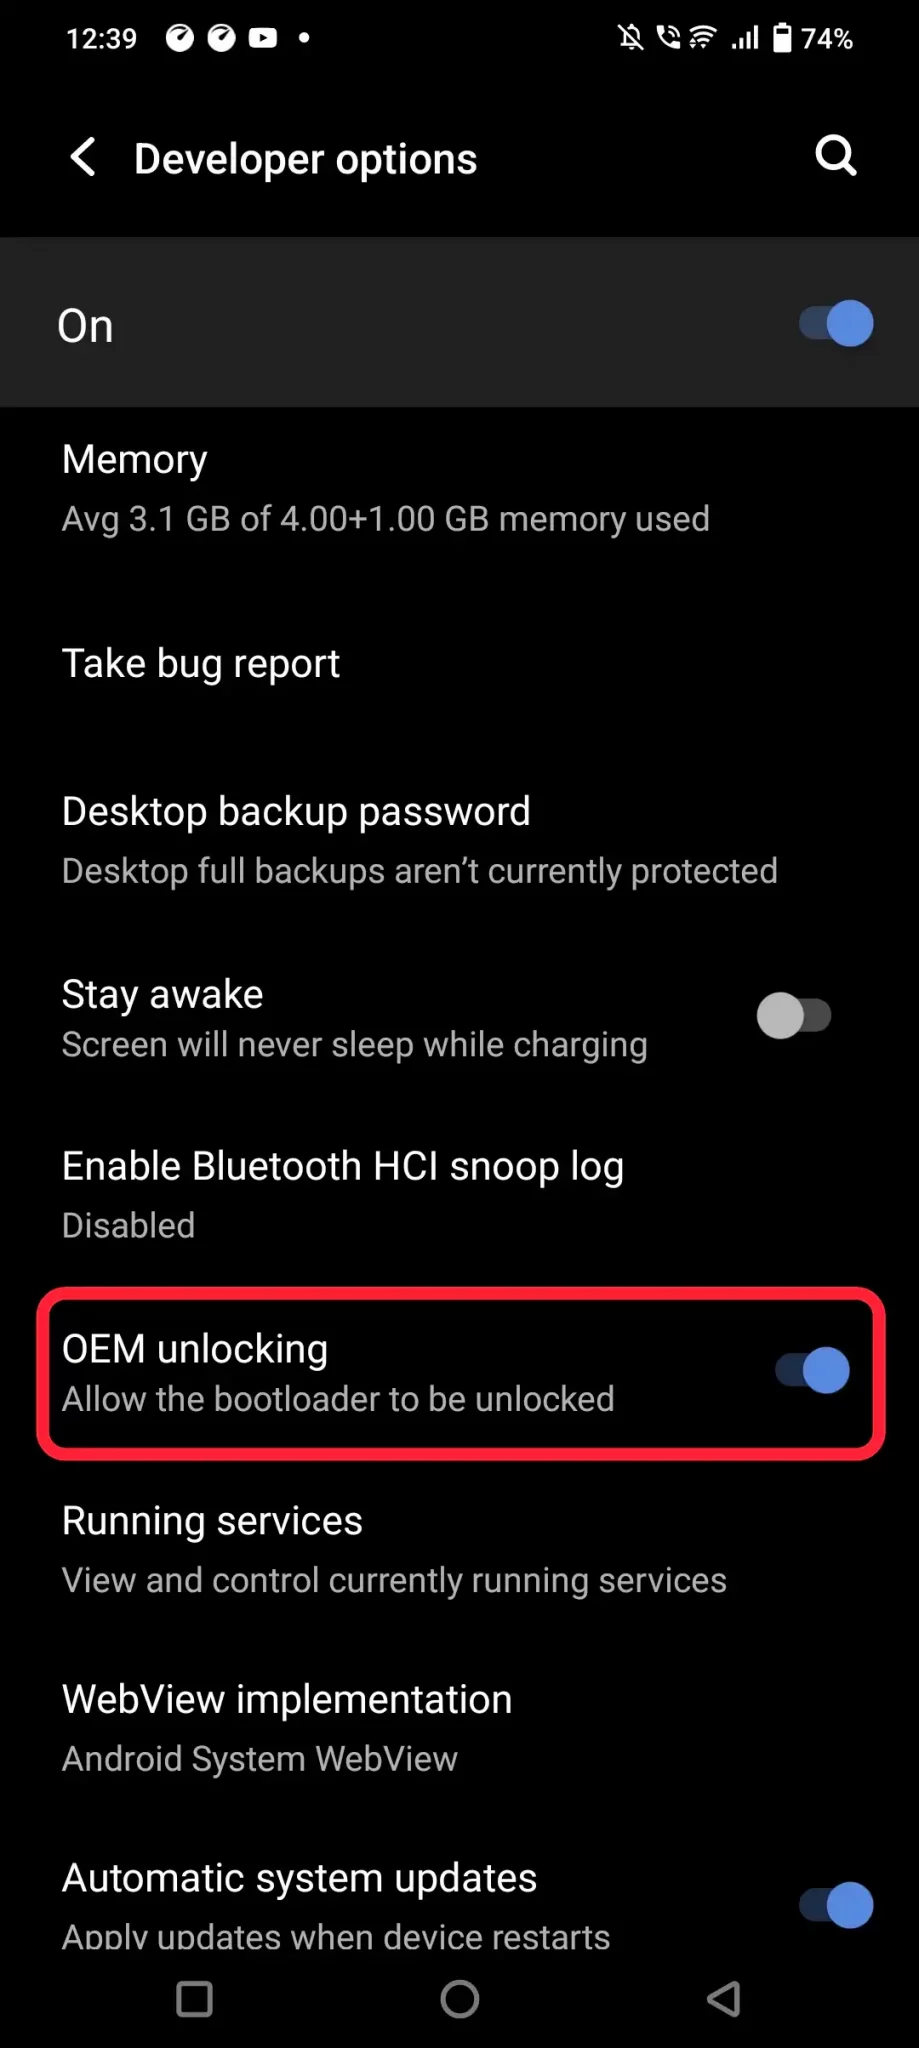
Step 3: Enable USB debugging and OEM unlocking
You’ll need to enable Developer Options on your smartphone. Go to settings -> About phone -> tap on build number 7 times -> return to Settings -> system -> advanced -> developer options -> finally enable USB debugging and OEM unlocking.

Step 4: Unlock the bootloader
You’ll need to unlock the device’s bootloader. If you have previously performed the update through Flash Tool or Fastboot, the bootloader will already be unlocked. If you’ve performed the upgrade through ADB sideload, you’ll need to carry out this task.
How to downgrade Android 13 to Android 12 using Fastboot
- To start off, download the Android 12 factory image for your smartphone and not the OTA
- Once it is downloaded, you should extract it inside the platform-tools folder
- Head over to the platform-tools folder, and type in CDM in the address bar, before hitting enter. It’ll launch the Command Prompt.
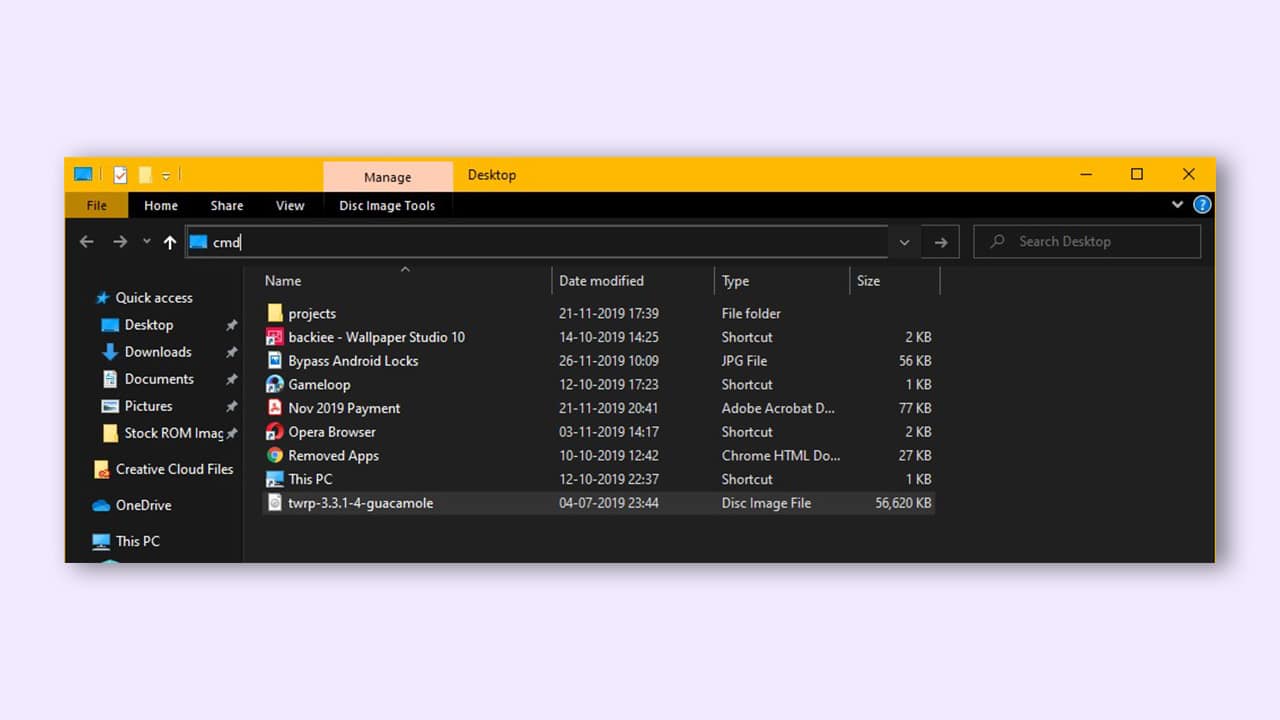
- Type in this command in the CDM window for booting your device into Fastboot Mode
adb reboot bootloader
- Double-click on the flash-all batch file and the flashing process will start
- While it’s going on, your smartphone will automatically boot to Fastboot and FastbootD modes, which is normal
- Once the entire process is complete, you’ll get notified of the same. Your device will automatically boot to the Android 12 OS
Via Android Flash Tool (Method 2)
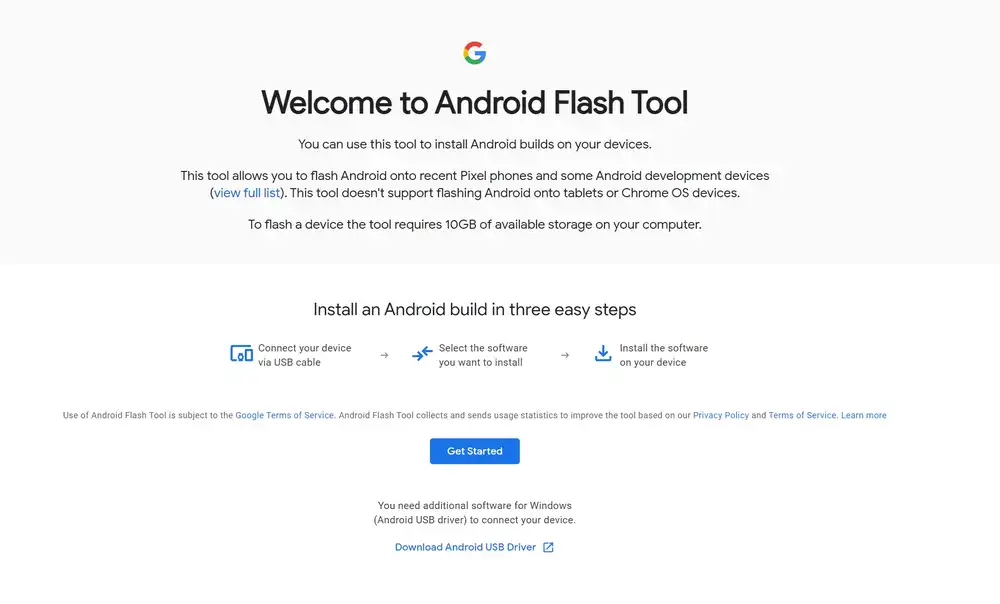
First, visit Android Flash Tool and select your device. Connect your Pixel to a computer via USB-C and visit the firmware page for your device. Choose the correct build for your phone and click “Flash” next to “Version.” This will launch the Android Flash Tool website and load the firmware on your device.
Tap “Get Started” to authorise ADB access. This means your Pixel can communicate with your computer and the downgrade from Android 13 Beta 3 (Beta 1 or 2, Preview 1 or 2) to Android 12 (or another available OS update) can begin.
The new page explains the steps. If your phone is connected and in Recovery mode, click “Add a new device.” Double-check your Pixel’s software build before installing it. You may also relock the bootloader from here, saving time. When the License Agreement box displays, click “Install” and “I accept.”
This should take a few minutes, but make sure your device stays connected. You’ll see a page that says “Software updated” and your Pixel should boot into the software you chose.
Conclusion
This concludes our tutorial on reverting from Android 13 to Android 12. We’ve included 2 methods here. Please let us know in the comments if you have any questions about the procedures we have outlined above. We promise to get back to you as soon as possible with an answer.
Liked this post? Let us know on X (formerly Twitter) - we love your feedback! You can also follow us on Google News, and Telegram for more updates.
