Unlocking the bootloader of Motorola will clear the way to root the Motorola Moto G Stylus. Like most of the Android devices, Motorola Moto G Stylus also comes with an unlockable bootloader.
Rooting is the process of gaining full admin control of the Android device. You can use the device to its full potential,‘Rooting’ means giving yourself special privilege or “root permissions” on your phone. It’s similar to running programs as administrators in Windows.
The Motorola Moto G Stylus comes equipped with a 6.40-inch touchscreen display with a resolution of 1080×2300 pixels. The device is powered by an octa-core Qualcomm Snapdragon 665 processor coupled with 4GB of RAM and 128 GB of internal storage with microSD card support for memory expansion.
The Motorola Moto G Stylus runs Android 10 and is powered by a 4000mAh non-removable battery and supports proprietary fast charging. It features a triple (48MP + 16MP + 2MP) rear camera setup and a 16MP front-facing camera.
For more information about Android rooting, check out our detailed post here > What Is Rooting Android Phone? Advantages And Disadvantages
Important Note: Without TWRP, you can’t flash the root files like Magisk. Now we have to manually modify the stock boot image by a patch to get root access on the device
Warning
rootmygalaxy.net will not be held responsible for any kind of damage occurred to your device while following this tutorial. Do it at your own risk. This will void the warranty of your device.
Pre-Requirements
- Make sure battery percentage is more than 60%
- Make sure you have installed USB Drives on your PC.
- Install ADB & Fastboot drivers on your computer. Guide Quickest Way To Install Android ADB and Fastboot (with drivers) on Windows or How to Install ADB and Fastboot on Mac or Linux
- Now Enable Developer option. Guide How to Enable Developer Options & USB Debugging on Android
- Create a nandroid backup on your device How To Create & Restore Nandroid Backup On Android Devices
How To Unlock Bootloader On Motorola Moto G Stylus?
- First, enable ‘USB debugging and OEM Unlock’ option from setting> developer option>. To enable Developer Options, go to About phone and tap the Build Number 7 times.
- Install the ADB and fastboot drivers and then restart if you already have the driver installed then skip this step.
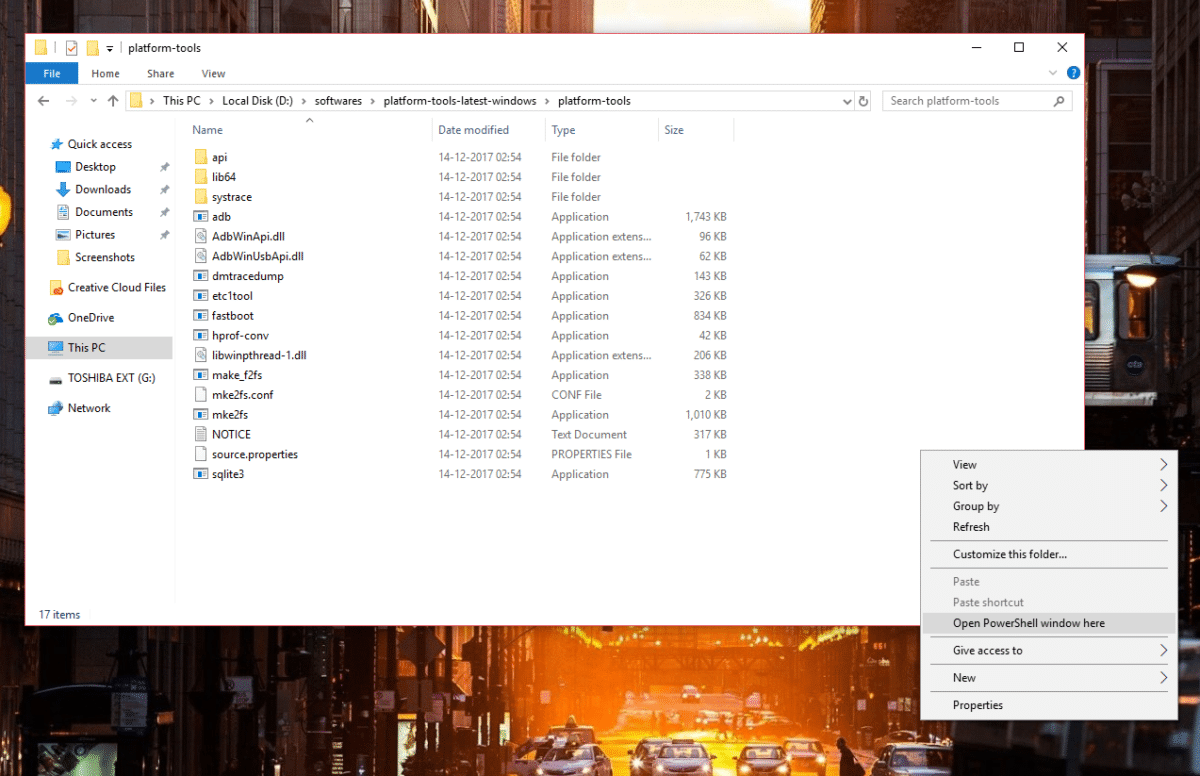
- After installation of the driver, you can see a folder named ADB in your installation directory. Enter the folder, and you find four files including ADB and fastboot.exe.
- Now press and hold ‘shift’ key and right-clicked anywhere in the folder and select ‘Open command window here’ or ‘PowerShell Window’
- Now connect your device to PC and enter into the fastboot mode. To enter the fastboot mode of Motorola Moto G Stylus, type the below command in command prompt.
adb reboot bootloader
- In the command window, type the following command.
fastboot oem get_unlock_data
- The above command will return a string.
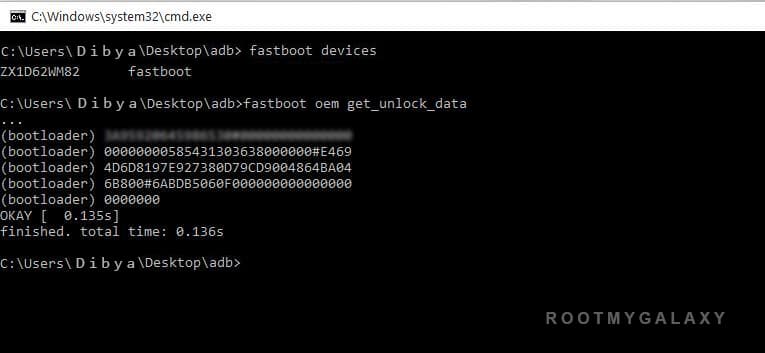
- Now copy the code in notepad and delete all the blank space so that you will get a single line string.

- Now head over to the Motorola’s unlock the boot loader site and create a free account or Sign in Google+.

- Now Paste the above String (Unlock Code) at the bottom of the Moto site (step 6) and click on Can my device be unlocked? You also need to accept terms and condition on this page by clicking I Accept.
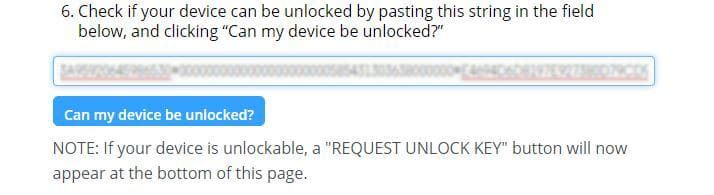
- The unlock key will be sent to your E-Mail ID, which you used to register at Motorola site.
- Now copy the Unlock Key and execute the following command.
fastboot oem unlock UNLOCK_KE
- The above command will Unlock Bootloader of Motorola Moto G Stylus.
- Reboot and done.
How To Root Motorola Moto G Stylus with Magisk No TWRP ?
#1 Get the stock boot image (Stock Firmware)
- you can download Stock ROM of the device (You can find that on the web or Xda forum)
Download the boot file according to your device. Once downloaded, unzip the file and open it, look for a .zip file. Open that file too, now you will see a file named boot.img (This is the official stock image or firmware)
#2 Patch boot image
- Move the boot.img to your device’s internal storage.
- Download & install the latest Magisk Manager on your device
- Open magisk manager, On the main screen, select Install > Install > Select and Patch a File
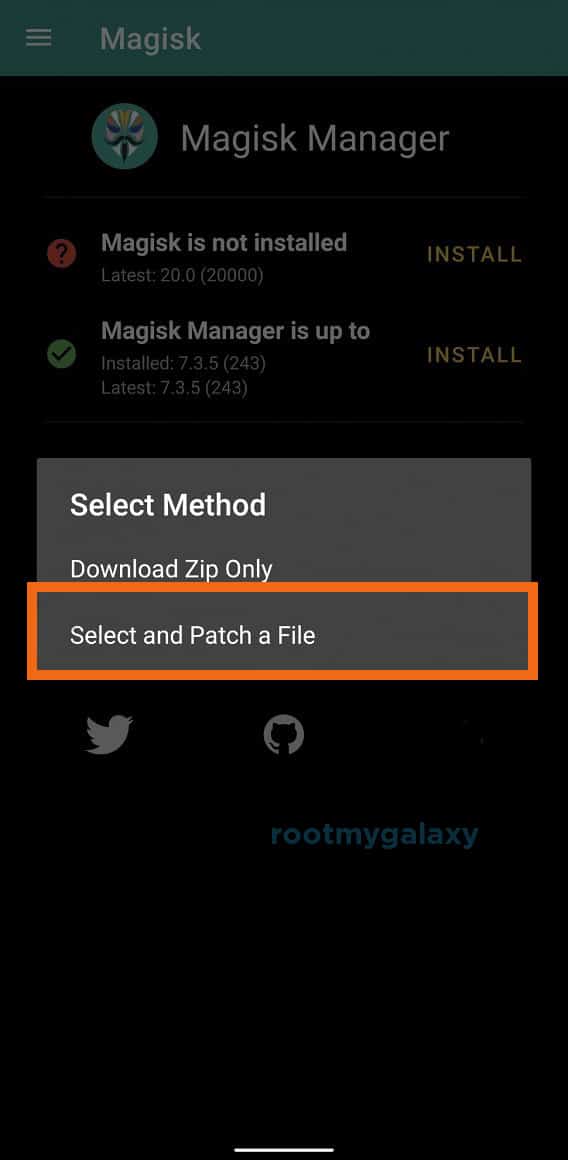
- Now select the boot image (boot.img). Magisk will start to patch the boot image.
- After completion, the file will be saved as “magisk_patched.img” in your Downloads folder
#3 Steps To Root Motorola Moto G Stylus
- Connect your device to PC and transfer the “magisk_patched.img” file from your phone’s download section to the platform-tools folder on your PC
Download and Install Latest ADB and Fastboot SDK Platform-Tools (2019)
- Now issue the following command to boot your device to bootloader mode (Make sure your device is connected to the PC)
adb reboot bootoader
- Now issue the command given below to Flash the patched boot image
fastboot flash boot magisk_patched.img
- For devices with A/B partition system, use the below commands:
fastboot flash boot_a patched_boot.img

fastboot flash boot_b patched_boot.img
Done !!! Just reboot your device. Your device should be rooted now.
Liked this post? Let us know on X (formerly Twitter) - we love your feedback! You can also follow us on Google News, and Telegram for more updates.

Dude – where is the link to the stock firmware? That is such a non-obvious ask for me
We have mentioned that stock ROM file can be found on Xda or on other sites