The Samsung Galaxy S24 Ultra, one of the latest additions to the Samsung family has been grabbing the attention of the masses. It comes with a slew of AI features and new additions. However, there are a few bugs and issues as well.
One of those issues is the WiFi not working in Samsung Galaxy S24 Ultra. Many users are having issues connecting to the 6.5GHz Wi-Fi. For some users, only the 2.4GHz has been bugged while for others, the 2.4GHz and 5GHz spectrum seem to be giving issues too.
With that said, there are workarounds to help you with this issue. In this guide, you will get to know how to fix WiFi Not Working in Samsung Galaxy S24 Ultra.
Table of Contents
How to fix WiFi Not Working in Samsung Galaxy S24 Ultra

Method 1: Toggle the Airplane Mode (Flight Mode)
- First, you should bring up the Quick Settings plane present at the top of the screen
- After that, tap on Airplane Mode for enabling it
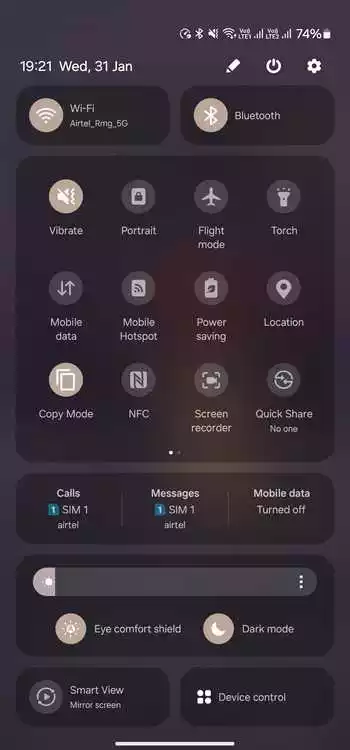
- Wait for a few seconds before disabling it
- Check if this fixes WiFi Not Working in Samsung Galaxy S24 Ultra
Method 2: Enable Wi-Fi Safe Mode
- First, you need to delete the saved Wi-Fi network to which you’re trying to connect
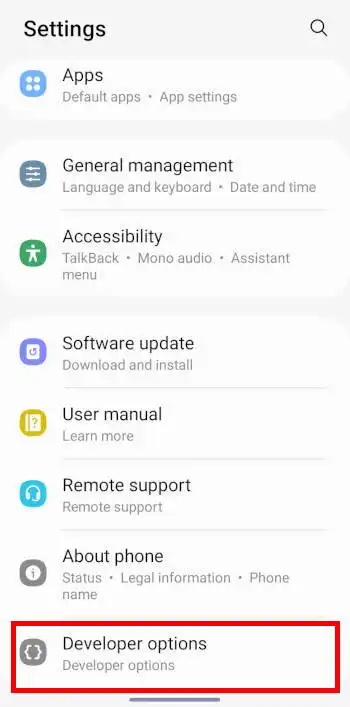
- Now, tap on the Build Number seven times for enabling Developer Options
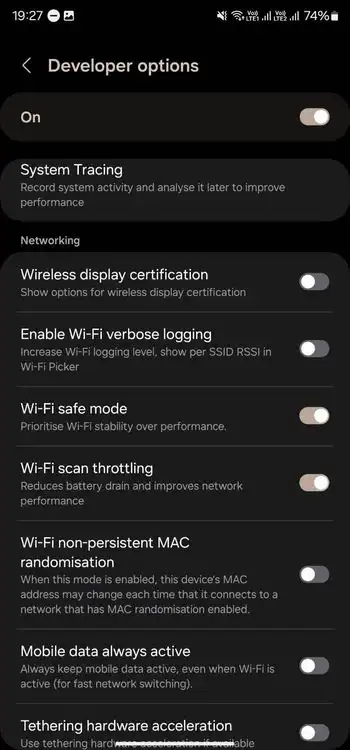
- After that, you should enable Wi-Fi Safe Mode
- Select the Wi-Fi Network and set the static IP address before selecting Use Phone’s MAC
- Lastly, restart your device and check if WiFi Not Working in Samsung Galaxy S24 Ultra is fixed
Method 3: Turn off intelligent Wi-Fi
- Head over to Settings -> Connections -> Wi-Fi
- Now, tap on the overflow icon present at the top right
- Choose the “Advanced” option and you’ll be taken to the Intelligent Wi-Fi page
- From here on, you should disable the toggle beside Turn on Wi-Fi Automatically
- Check if this resolves the WiFi Not Working in Samsung Galaxy S24 Ultra
Method 4: Switch to Private DNS
- Go to Settings -> Connections -> More Connection Settings
- Head over to Private DNS and then select the Private DNS provider hostname
- Type in one of the three below-listed DNS addresses before hitting Save –
Google DNS – dns.google
Cloudflare DNS – 1dot1dot1dot1.cloudflare-dns.com
AdGuard – dns.aquaguard.com
- Check if this fixes the issue
Method 5: Reset the network
- To start off, you should go to Settings -> General Management
- Now, go to Reset Network Settings before tapping on Reset Settings
![]()
- Hit the Reset button and wait until it is completed
- Once it is done, reconnect with the Wi-Fi and check if the issue is resolved
Featured image: HTtech
