Samsung Galaxy S23 Ultra is the premium device from the latest flagship series released by Samsung. These devices have grabbed a few eyeballs since their release.
Aside from being among the go-to options for everyday users, the Galaxy S23 Ultra is also the preferred option for tech enthusiasts. The device has received custom ROMs that beholds a number of intriguing features with Google Photos storage, taking screenshots, Call Recording selections, and more.
If you’re looking to install the BeyondROM Custom ROM, then this guide is perfect for you. In this guide, you will get to know how to install Beyond ROM Custom ROM on your Samsung Galaxy S23 Ultra.
Table of Contents
How to install Beyond ROM Custom ROM on your Samsung Galaxy S23 Ultra
Step 1: Unlock the Bootloader
First, you should unlock the bootloader on your device. Remember, this will trip Knox and void the warranty.
Guide: How to unlock booatloader on Samsung Galaxy S23 Ultra
Step 2: Flash TWRP and patch Vbmeta
Next, you will need to install the TWRP Recovery and the patched vbmeta via Odin.
Guide: How to install TWRP Recovery and root Samsung Galaxy S23 Ultra
Step 3: Boot your device to TWRP
- Power off the device and connect it to the PC using a USB cable
- After that, you should press and hold the Volume Up + Power keys for 7 seconds or so
- Your smartphone will boot to the TWRP Recovery

Step 4: Format Data using TWRP
- From TWRP, you’ll have to wipe before selecting Format Data

- After that, select YES in the space provided and then tap on the checkmark at the bottom right
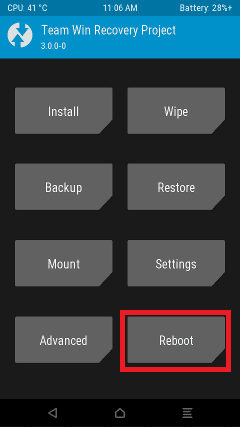
- Once the format is done, you’ll need to reboot the device to TWRP
- Press Reboot and select Recovery
Step 5: Transfer the ROM file to your device
- Get hold of the BeyondROM files from the link mentioned below –
CURRENT VERSION
SM-S911B ROM Download CXD2 [BR2.6]
SM-S916B ROM Download CXD2 [BR2.6]
SM-S918B ROM Download CXD2 [BR2.6] [Credit: Xda developer]
- Ensure that you’re downloading both the P1 and P2 files
- After that, transfer both files to your device using TWRP
Step 6: Flash BeyondROM
- From TWRP, you should head over to install, choose the P1 zip file, and perform a right swipe for flashing it

- Once it is done, you need to go to install, select P2 zip file, and right swipe to flash it
- Follow the on-screen instructions for completing the setup
- Once it is done, you should hit Finish
- Now, go to Reboot before selecting System
- Your smartphone will now boot to the newly installed OS

where did the files go?
Updated
where can I find the p1 and p2 file?
Those are in the ROM files. We have added extra information about those.