Are you someone looking to root Android 15 using Magisk Patched Init_Boot and enjoy the plethora of features and tinkering options? If yes, then you are in the right place. In this guide, you will get to know how to root Android 15 using Magisk Patched Init_Boot.
Google has recently started rolling out the newest iteration of Android OS. The Android 15 update brings in a wide array of intriguing features like Private Space, Battery Health Percentage, Notification Cooldown, Lock Screen Widgets, App Archive, and more.
Dipping your toes in the custom development scene will present a plethora of tinkering options for tech enthusiasts. You can gain the administrative privileges once you root Android 15 using Magisk Patched Init_Boot.
How to root Android 15 using Magisk Patched Init_Boot?
Step 1: Install Android SDK
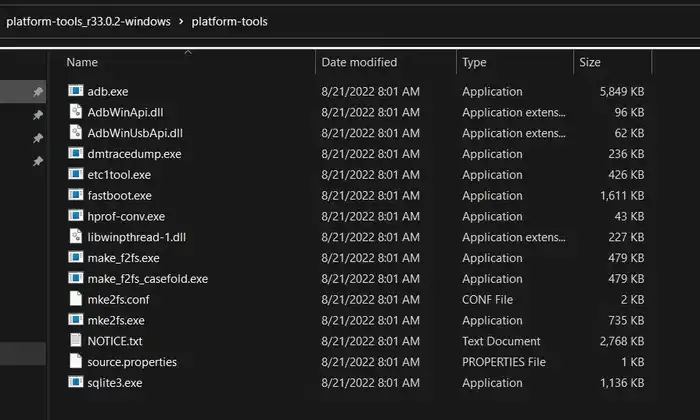
Firstly, you’ll need to install the Android SDK Platform Tools on your PC. It’s the official ADB and Fastboot binary offered by Google. You’ll need to download it and extract it to a convenient location on your PC.

Step 2: Enable USB Debugging and OEM Unlocking
To start off, you’ll need to enable Developer Options on your smartphone. Go to settings -> About phone -> tap on build number 7 times -> return to Settings -> System -> Advanced -> Developer Options -> Finally enable USB debugging and OEM Unlocking.
![]()
![]()
![]()
Step 3: Unlock the bootloader
There is often an element of confusion regarding this step but to put it into perspective, you’ll need to unlock the bootloader on your device. Remember, unlocking the bootloader on your OnePlus device will mean wiping off all the data on your phone and nullifying the device’s warranty. Check out our detailed unlocking guide for some devices which can be used for all devices from the respective company.
Step 4: Extract Stock Fold Init_Boot.img
- To start off, you’ll need to download the stock firmware/factory image for your handset
- You should ensure that you download the same version that is installed on your smartphone currently
- To check for it, go to Settings -> About Phone -> Build Number
![]()
- Once downloaded, you’ll need to extract it to any convenient location on your PC
- For Pixel smartphones, you can extract the firmware using WinZIP/WinRAR and get the init_boot from the Images folder
- For Xiaomi handsets, download the Fastboot ROM and then extract the TGZ followed by TAR folders to reach the Images folder from where you can get the init_boot file
- Once you’ve extracted the firmware, you should copy the init_boot.img
Step 5: Patch Boot/Init_Boot using Magisk
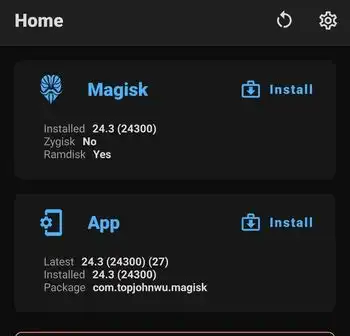
- Download and install the Magisk app
- Launch it and tap on the Install button beside Magisk

- Then, you should choose “Select and Patch a File”
- Navigate to the stock init_boot file before selecting it
- Tap on the “Let’s Go” option at the top right
- The init_boot file will be patched and placed under the Downloads folder
- Transfer the file to the platform-tools folder on the PC
Step 6: Boot your device to Fastboot Mode
- Connect your phone to the PC via USB cable
- Ensure that USB debugging is enabled
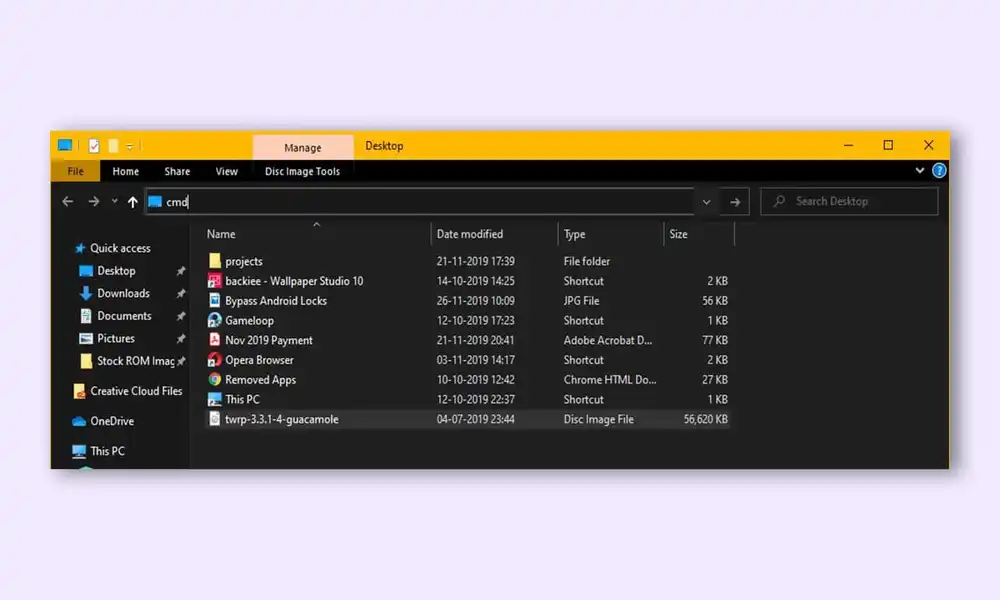
- After that, head over to the platform-tools folder, type in CMD in the address bar, before hitting Enter

- It’ll launch the Command Prompt
- Type in the following command in the CMD window for booting your device to Fastboot Mode
adb reboot bootloader
- Then, type in the below command to verify the Fastboot Connection
fastboot devices
- If you’ve got a device ID followed by the fastboot keyword, the connection will be successful
Step 7: Root Android 15 handset using Magisk Patched Init_Boot
- Type the following command in the CMD window for flashing the patched init_boot.img file –
fastboot flash init_boot magisk_patched.img
- Ensure that you’re replacing magisk_patched.img with the appropriate name of the patched init_boot.img file
If this command didn’t work, you’ll have to manually flash the init_boot to both slots via the below command –
fastboot flash init_boot_a magisk_patched_boot.img fastboot flash init_boot_b magisk_patched_boot.img
- Your smartphone will boot to the root Android 15 OS
- If it doesn’t happen, you can manually boot to the root Android 15 OS by entering the following command –
fastboot reboot
We hope this guide helped you root Android 15 using Magisk Patched Init_Boot. If you have any questions or suggestions, feel free to mention them in the comments section.
