Guide: Step By Step tutorial to Enable Google Prompt To Make 2-Step Verification On Android devices.
Securing your online access is crucial in the digital age where hackers and scammers are lurking around the corner. Even the top online services like Twitter, LinkedIn, PlayStation Network haven’t escaped from the wrath of a security breach.
Google has already introduced 2-step verification process to enhance security when you use Google accounts to log in. You have to wait for the OTP on your mobile and enter the OTP on the website within a few minutes for secure account access. However, this extra step takes a few additional seconds and you need to access your mobile for logging in. This has made 2-step verification less popular among lazy online users. Now, to make things easy for everyone while enhancing security, Google has introduced Google Prompt to simplify the 2-step verification process. With Google Prompt, you only have to touch on the notification on your iOS or Android device to verify your sign-in.
So without any delay let’s talk about the steps to Enable Google Prompt To Make 2-Step Verification
[symple_box color=”gray” fade_in=”false” float=”center” text_align=”left” width=””]
Table of Contents
You May Like:
- How to Hide Your Online Status In Whatsapp On Android
- How to get Android N features on Any Android Phone
Enable Google Prompt To Make 2-Step Verification Through Google Account
To start using Google Prompt, you have to initialize the settings on the Google accounts page. Follow the steps below to enable 2-step verification. (With Images)
1. Go to myaccount.google.com and login to the Google account that you want to connect with Google Prompt.
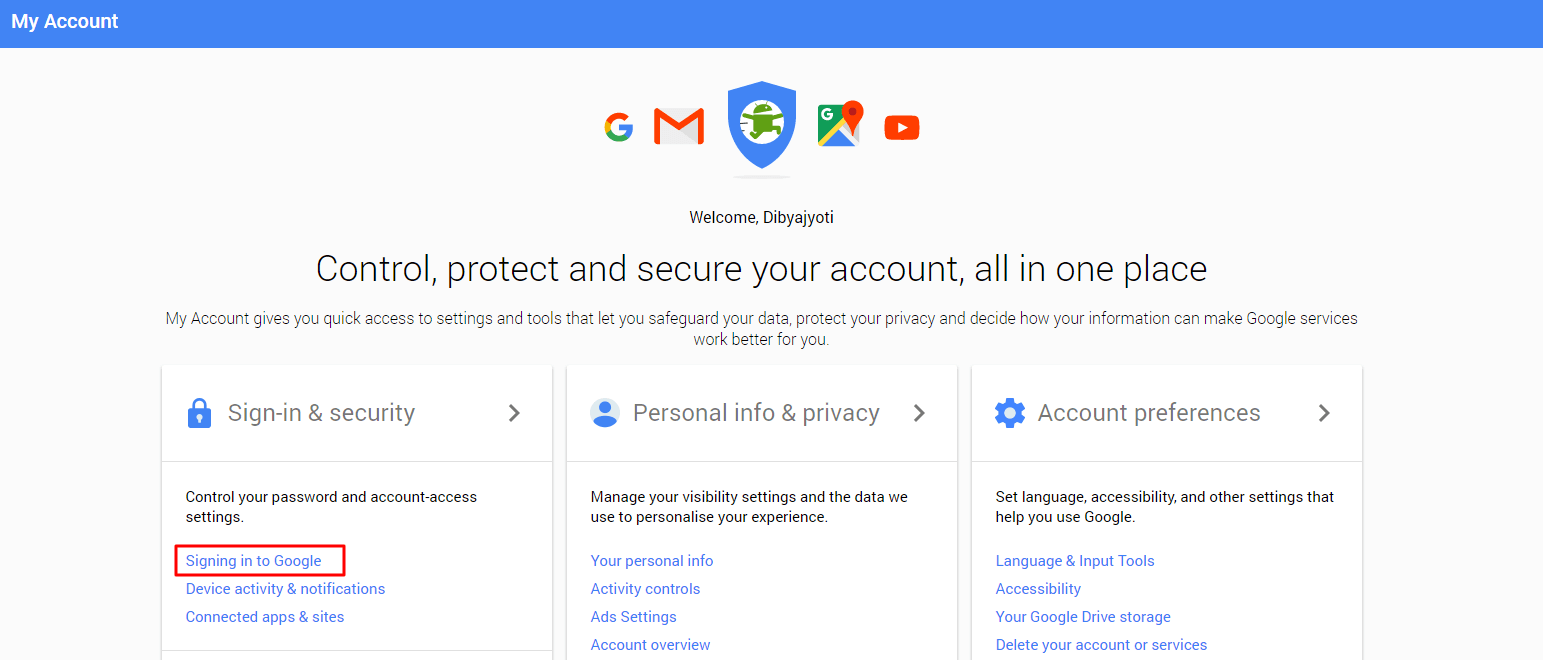
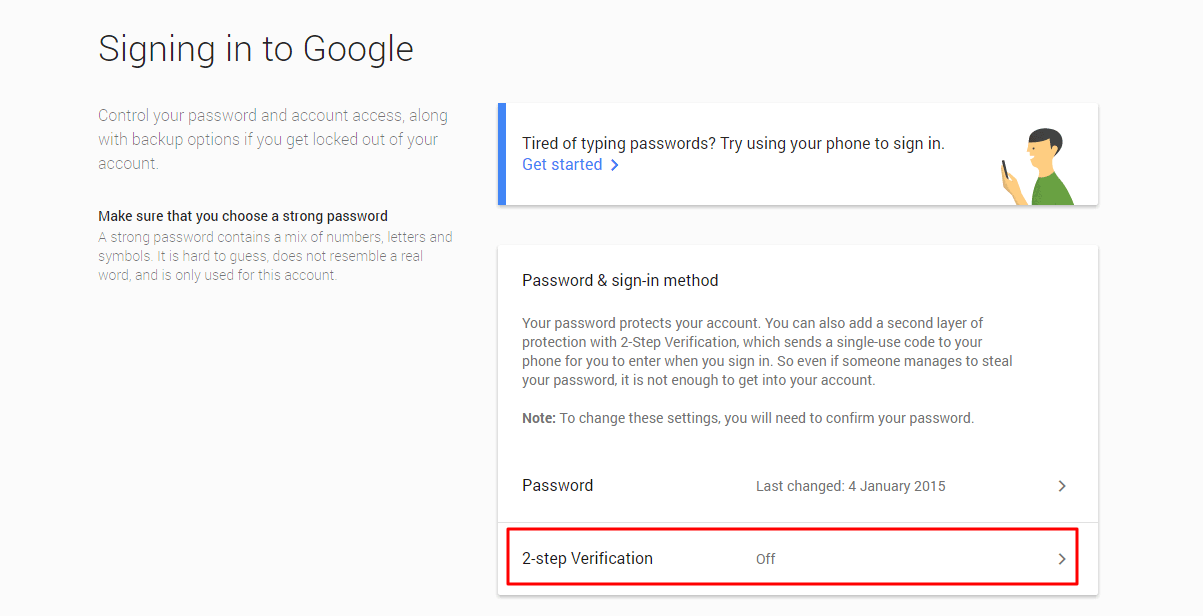
2.Click on Signing into Google and then click on 2-step verification. (Which was disabled by default)
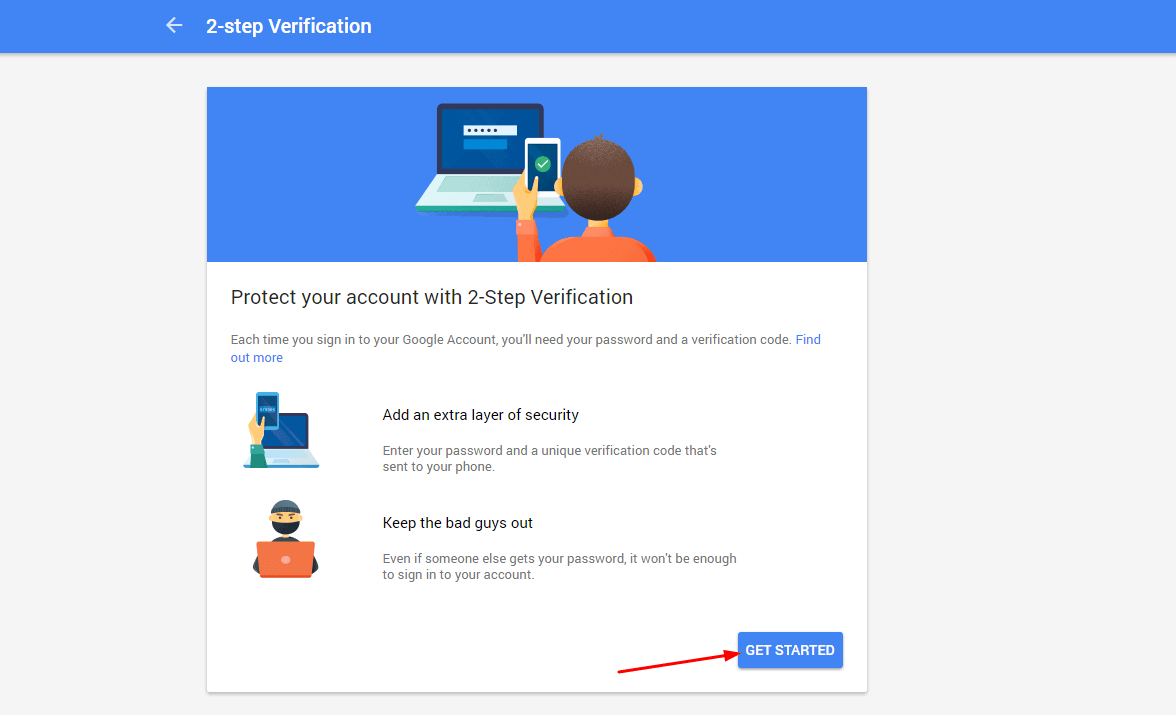
3. Click on Get Started. You will be prompted to re-enter your password.

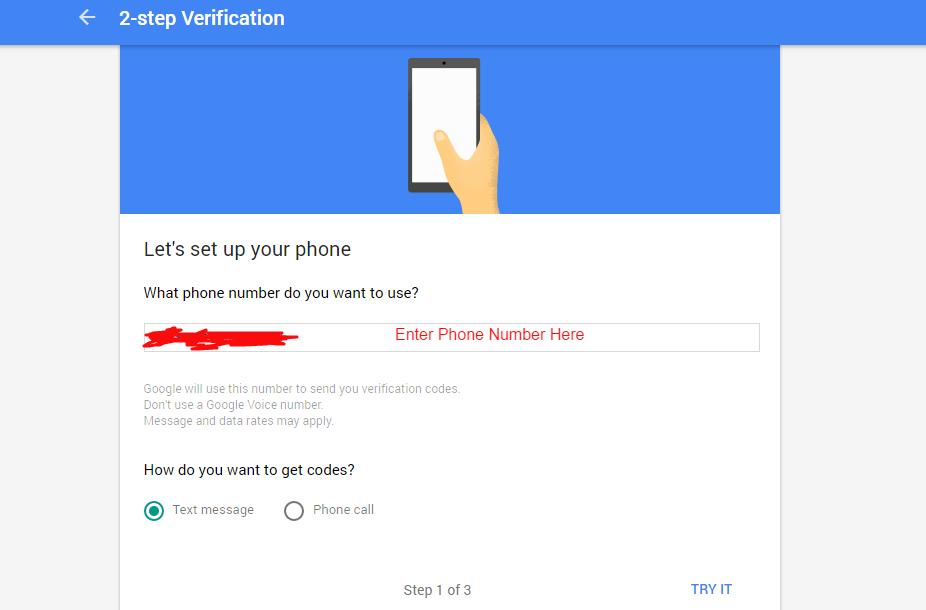
4.You have to type the phone number of the phone you want to use for Google Prompt authentication. You need to verify the phone number first before you can use it for 2-step verification. You can verify using an SMS or phone call. Click on Try it. On the next page, enter the six digit code you received on your phone and click Next.
5.Click on Turn-On to enable 2-step verification.
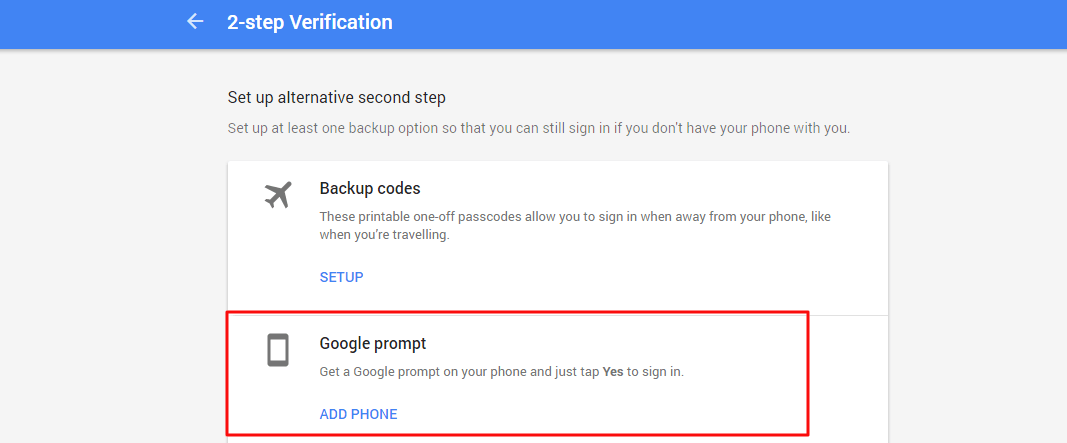
6.On the 2-step verification page, go to Set Up alternative second step and click on Add Phone. Then, click on Get Started.
7.From the drop-down menu, select your phone. If you can’t find your phone, you have to follow the below steps to sync your phone’s Google account first.
- For iPhone, download Google Search app and sign in using your Google account.
- For android phone, sync using the Google account and update Google Play Services.
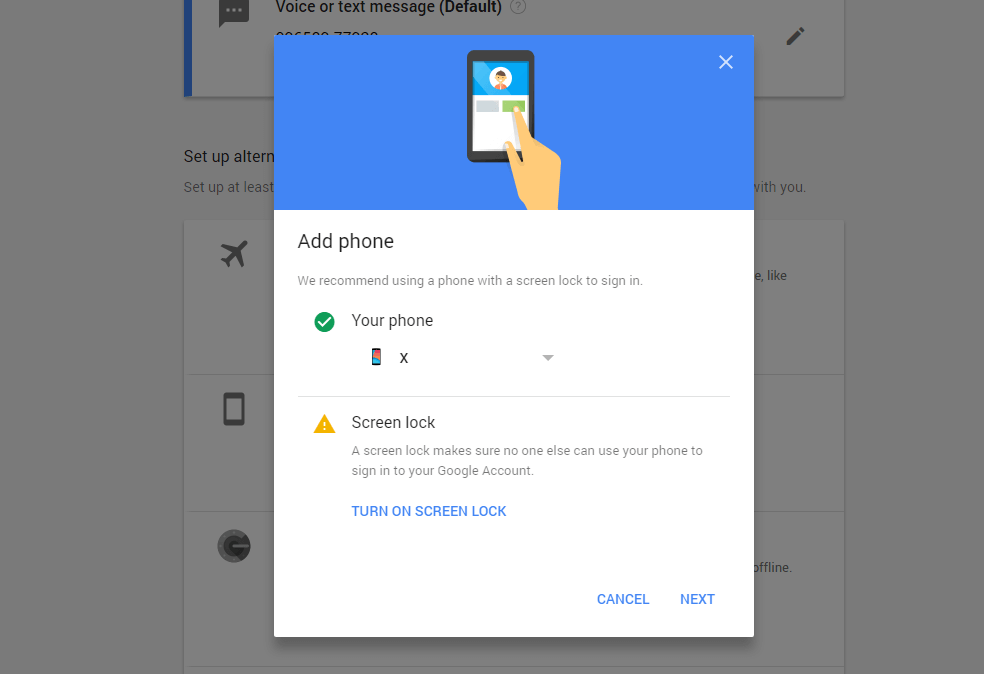
8.After choosing your phone, click on Next. You will receive confirmation prompt on your phone. (Example: Android)
- For iPhone, confirm the pop-up Confirm Google Prompt with TouchID. Then, choose Yes when you get Trying to Sign-in. Turn on push notifications in the next prompt.
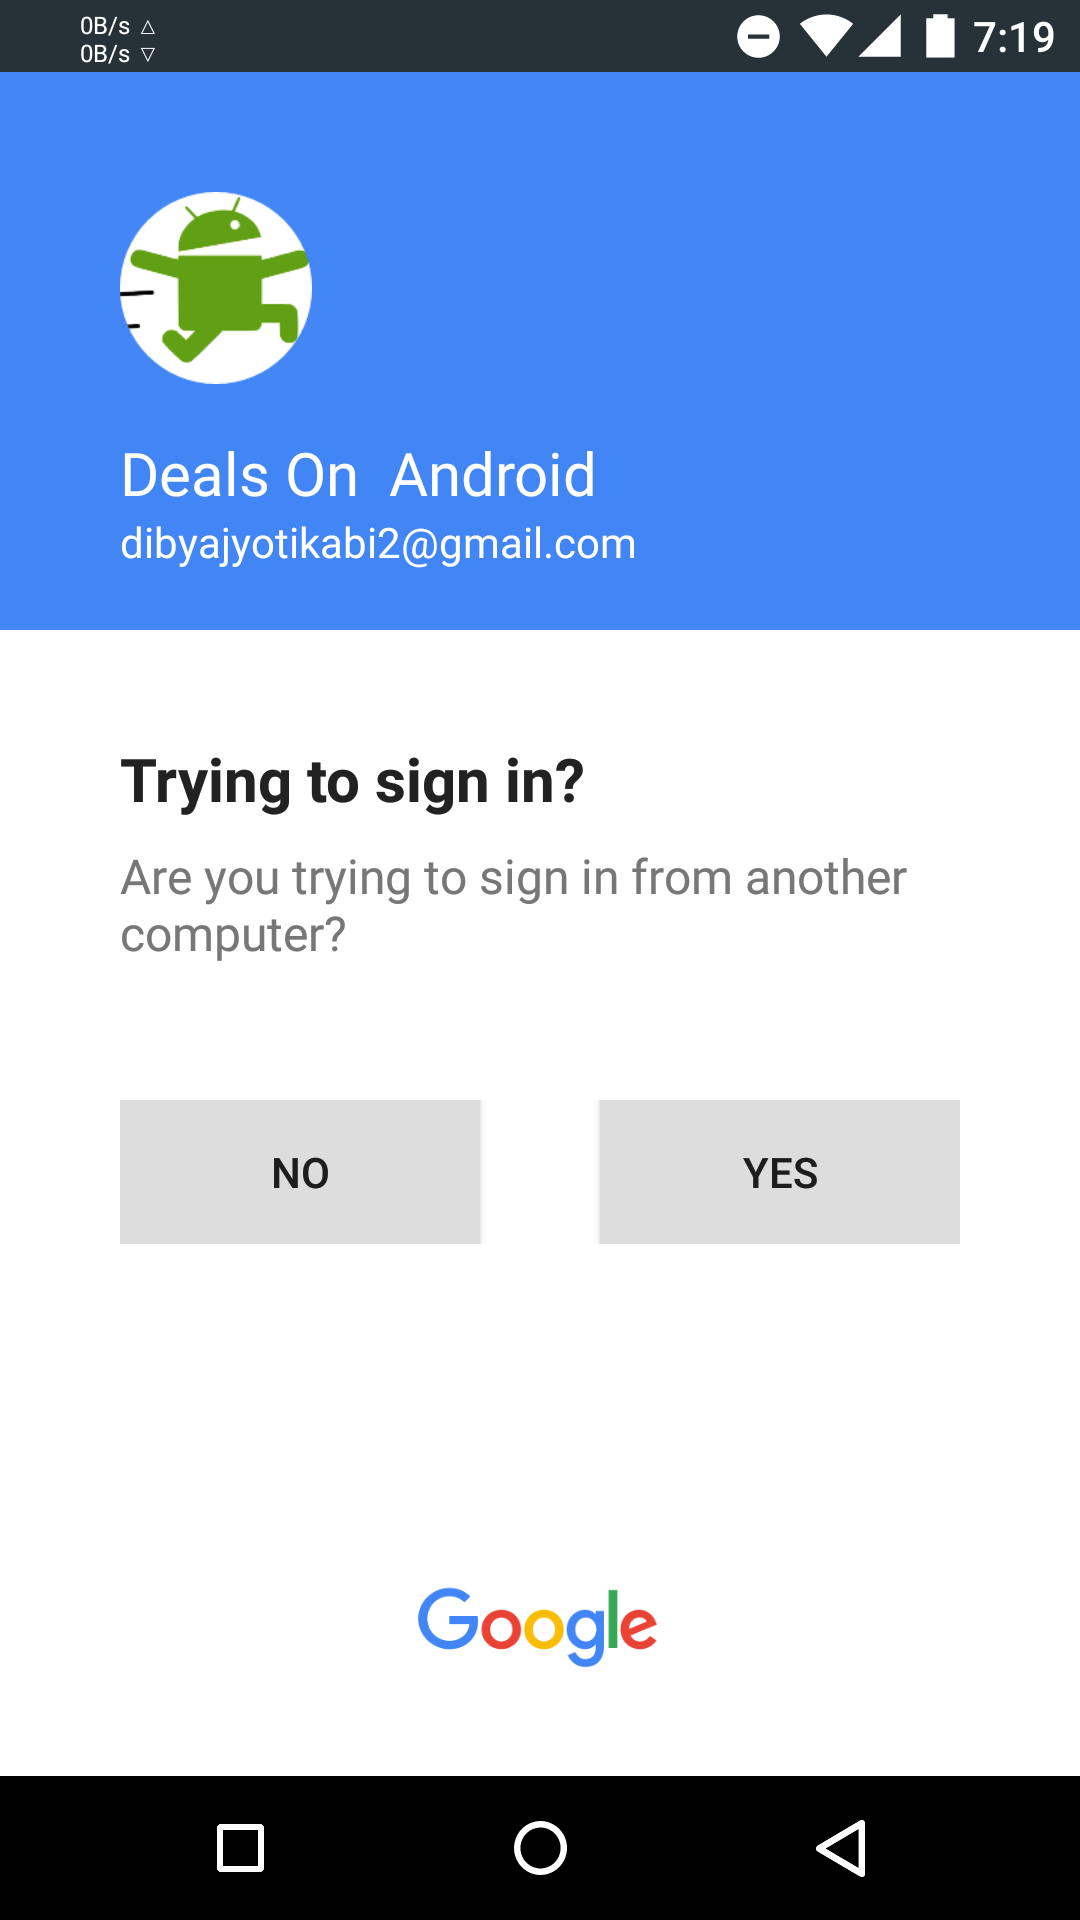
- For Android phone, choose Confirm Screen Lock when you get Trying to Sign-in prompt. Then, enter the unlocking pattern for your device. This can be anything such as a password, pin or pattern. Again, choose Yes on Trying to Sign in prompt.
9.Done!! You can now start using Google Prompt next time you use 2-step verification on any website. However, you should remember that this will work only on iPhone 5S or later and you should enable secured screen lock on your android phone. This prevents other users of your device from accessing data using your Google account.
If you found this tutorial helpful then please share this with your friends and family and if you have any question related to this post, feel free to leave that in the comment section 🙂
