Microsoft Windows OS comes with DirectX pre-installed which is a set of application programming interfaces (APIs) to deal with multimedia and heavy visual interface programs quite smoothly. However, users will have to periodically install Windows updates to have the latest DirectX version on their machine. But this process can also store the DirectX shader cache as time goes on. Luckily, you can quickly Clear DirectX Shader Cache in Windows 11 by following this guide.
We should also mention that most of the graphics-intensive programs like software and video games install the required DirectX package on the Windows system. The shader cache helps in loading the video games smoothly to avoid hiccups or jitters and it loads while launching the titles. In general, the DirectX shader cache improves the multimedia and gaming experience. However, several Windows users may encounter increased load time and infinite shader cache preloading while launching video games.
This mostly happens when the DirectX shader cache gets corrupted or stored for a long time. It’s always better to remove the cache data to help load the shader cache properly. Sometimes the stored cache data may get corrupted or sometimes may cause issues with the game loading. As a result, the storage space may get reduced and your DirectX shader cache may not work as expected. So, you can try deleting the shader cache of DirectX in Win11 by using the easy steps.
How to Clear DirectX Shader Cache in Windows 11
There are two easiest ways to do so and we’ve mentioned both methods for you. Ensure to follow any one of the methods as per your preference.
Method 1: Use System Settings
- Click on Start > Go to Settings.
- Click on System > Go to Storage.
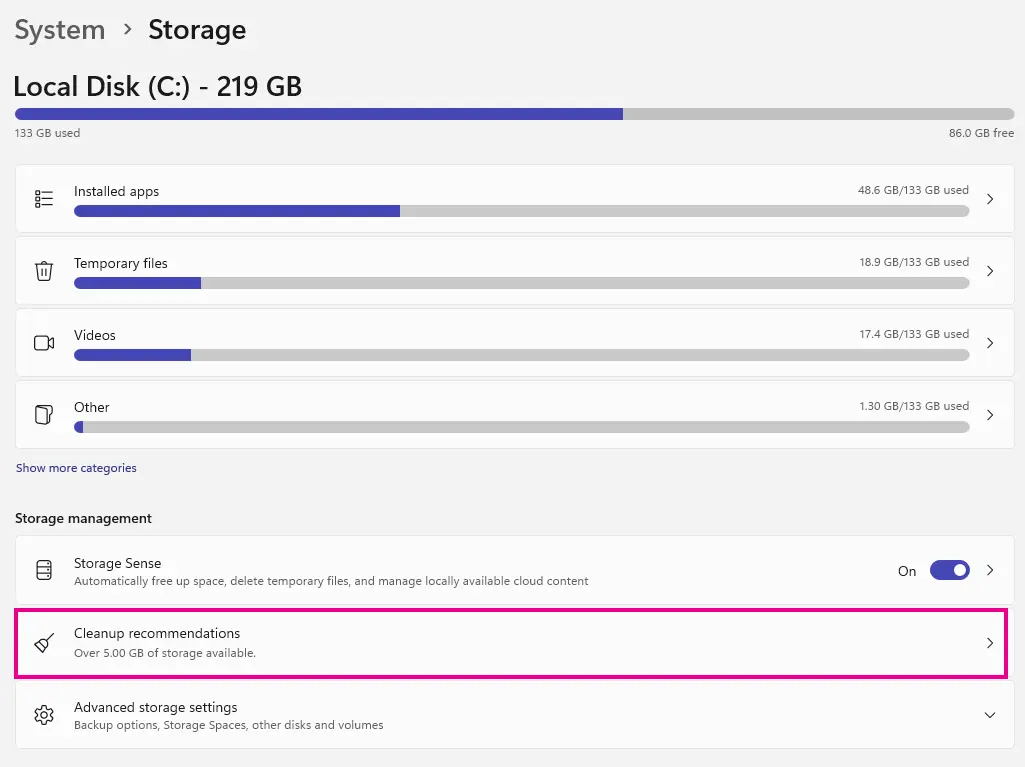
- Go to Cleanup Recommendations.
- Click on Temporary Files to expand.

- Select See Advanced Options.
- Next, click on Refresh to scan for temporary files.
- Ensure to unselect all options from the list.
- Only select the DirectX Shader Cache option.
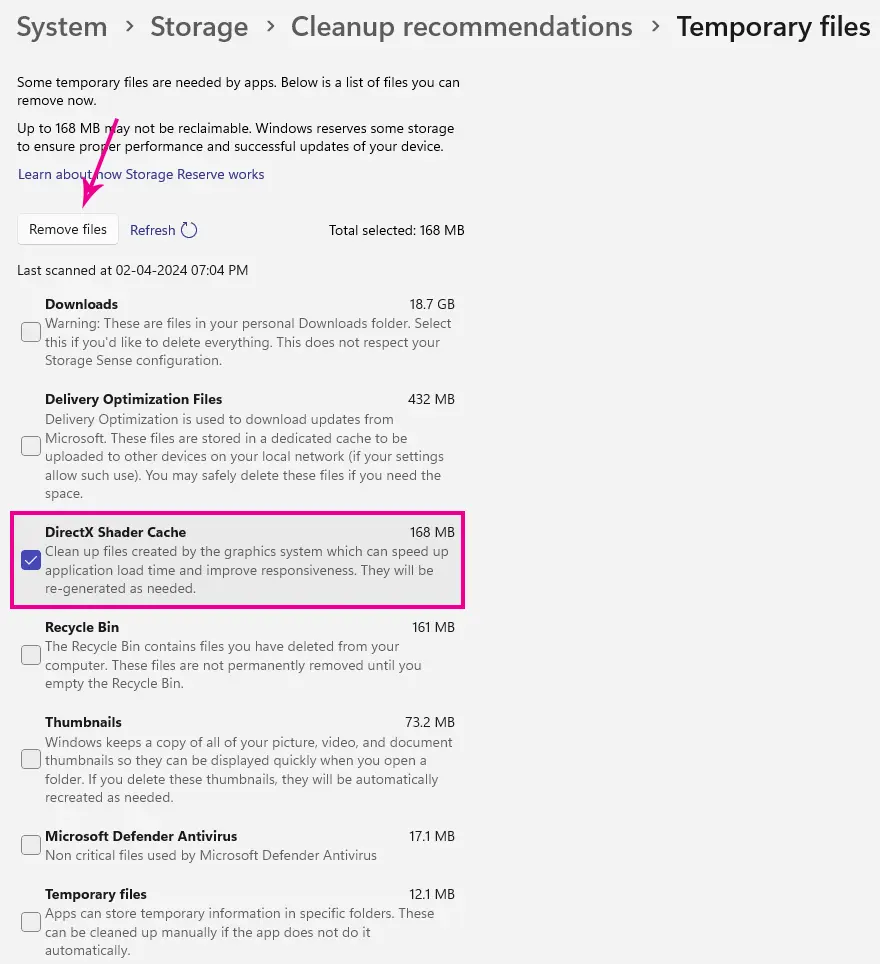
- Now, click on the Remove Files button.
- Wait for it to complete and manually restart your PC.
You May Also Like: Guide to Enable Ransomware Protection on Windows 10 and 11 PCs
Method 2: Use Disk Cleanup
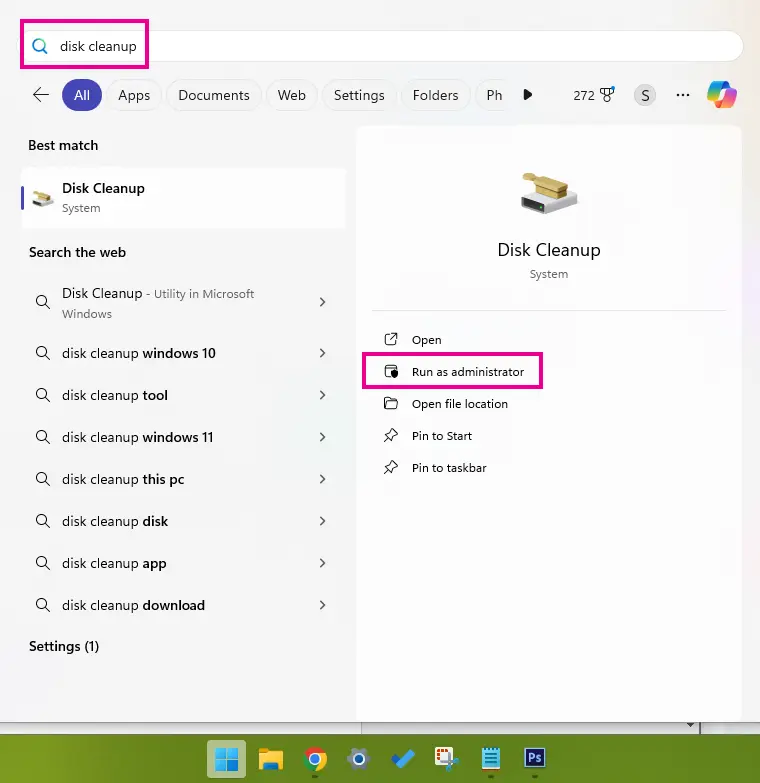
- Press the Windows+S keys to open the Search bar.
- Search for disk cleanup.
- Click on Run as administrator for Disk Cleanup.
- Select the system drive (C:) > Click on OK.
- You’ll see the Files to Delete section.
- Now, unselect all options from the list.
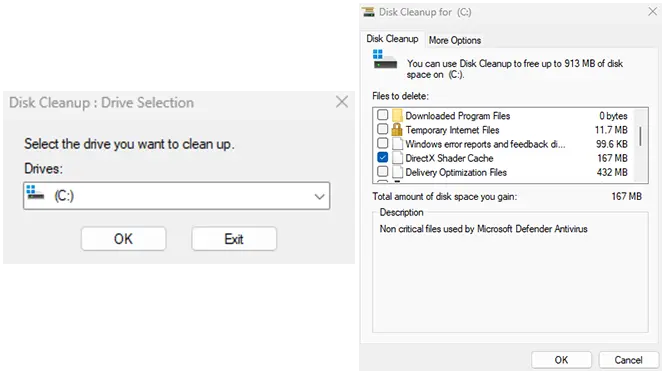
- Only select the DirectX Shader Cache option.
- Click on OK and wait for the same.
- Once done, you can reboot the system.
Well, this is how you can easily remove the shader cache of DirectX on your Windows 11 system. If you’ve any issues, you can comment below.
