Flashing custom ROMs on Android devices is powerful way to unlock new features and experiences. In this guide we will go through the detailed steps of flashing custom ROMs using Fastboot commands. While the process may seem intricate, especially for those accustomed to using custom recoveries like TWRP this method remains crucial for many devices including those where custom recoveries are no longer viable.
Important Note: Before going through the process it is crucial to back up all data on your device. The steps mentioned in this guide, involve procedures that could potentially result in data loss.
Step 1: Install Android SDK Platform Tools
The first step is negin by installing the Android SDK Platform Tools on your PC. Official ADB and Fastboot binary recommended by Google provides the necessary tools for the flashing process.
Step 2: Enable USB Debugging and OEM Unlocking
Turn the device on, then select OEM Unlocking and USB Debugging. Device recognition in ADB mode is made possible via USB Debugging, however bootloader unlocking requires OEM Unlocking.
![]()
![]()
![]()
- Navigate to About Phone > Settings > Press Build Number 7 a few times.
- Return to Settings > System > Developer Options and select Enable OEM Unlocking and USB Debugging.
Step 3: Unlock Bootloader on your Device

Follow our detailed guide on How to Unlock Bootloader of Any Android Device. Keep in mind that unlocking the bootloader will wipe all data from your device and may void its warranty.
Step 4: Download and Extract ROM
Download and extract the custom ROM onto your PC. Depending on the ROM, you will either get partition IMG files directly or a payload.bin file. Extract the BIN file using Fastboot Enhance Tool to obtain the required partition files in IMG format.
Step 5: Boot Device into Fastboot Mode
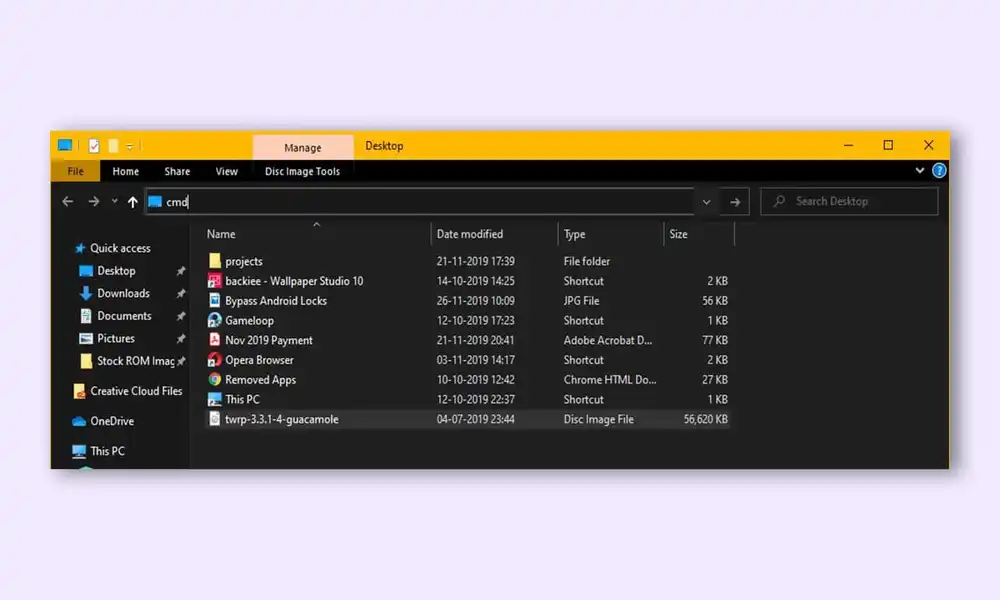
Connect your device to the PC via USB cable, ensuring USB Debugging is enabled. Navigate to the platform-tools folder, open CMD, and type the following command to boot your device into Fastboot Mode:

adb reboot bootloader
Verify the Fastboot connection:
fastboot devices
If no serial ID appears, install Fastboot Drivers.
Step 6: Flash Partition Files via Fastboot
Transfer the IMG files to the platform-tools folder and use the following commands based on the files you have:
fastboot flash boot boot.img
fastboot flash dtbo dtbo.img
fastboot flash vendor_kernel_boot vendor_kernel_boot.img
fastboot flash vendor_boot vendor_boot.img
For additional partition files refer to to the end of this guide.
Step 7: ADB Sideload ROM via Recovery
Rename the custom ROM to rom.zip and transfer it to the platform-tools folder. Boot device into AOSP Recovery and perform the following commands:
adb sideload rom.zip
For GApps:
adb sideload gapps.zip
Flashing Additional Partition Files
In some cases along with the essential partition files like boot, vendor_boot, dtbo and vendor_kernel_boot you may encounter additional partitions when flashing a custom ROM. Here is a step by step guide on how to flash these additional files:
Boot to FastbootD Mode:
Use the following command to boot your device to FastbootD Mode:
fastboot reboot fastboot
Flash system.img:
Execute the command to flash the system.img file:
fastboot flash system system.img
Flash system_ext.img
Flash the system_ext.img using the command:
fastboot flash system_ext system_ext.img
Flash product.img:
Use the command to flash the product.img file:
fastboot flash product product.img
Flash vendor.img:
Flash the vendor.img file with the following command:
fastboot flash vendor vendor.img
Reboot to Fastboot:
Reboot your device to Fastboot mode using
fastboot reboot-bootloader
Flash vbmeta and Disable Verity:
Execute the command to flash vbmeta and disable verity:
fastboot flash --disable-verity --disable-verification vbmeta vbmeta.img
Perform a Factory Reset:
Initiate a factory reset with the command:
fastboot -w
Boot to the Newly Flashed OS:
Finally, boot your device into the newly flashed OS using:
fastboot reboot
Flashing Custom ROMs on Pixel Devices via Fastboot (fastboot flash rom)
Developers have simplified the process of flashing custom ROMs on Pixel devices using Fastboot commands. Follow these streamlined steps to flash the ROM easily:
Boot to Fastboot Mode
Use the command to boot your device to Fastboot Mode:
adb reboot bootloader
Perform a Factory Reset (First Reset)
Initiate the first factory reset with
fastboot -w
Flash the ROM
Flash the ROM file using the command
fastboot update rom.zip
Perform a Factory Data Reset (Second Reset)
Initiate the second factory data reset with:
fastboot -w
Boot to the Newly Installed OS
Finally use the command to boot your device into the newly installed OS:
fastboot reboot
These detailed steps provide a guide on flashing custom ROMs via Fastboot commands. Unlock the full potential of your Android device with custom ROMs using this.