To unlock the bootloader on your Xiaomi, Redmi or POCO phone, you’ll need to have a PC with the Xiaomi Mi Unlock Tool installed and an authorized MI account that is bound to your device. Once you have these two things in place, follow all of the instructions carefully. This will ensure that everything goes smoothly and there are no unexpected issues when unlocking your device’s bootloader.
Table of Contents
Why Unlock the Bootloader?
Once unlocked, you can gain more control over your phone by installing custom ROMs or rooting it. However, keep in mind that this might void any warranty on the device so take extra caution when doing anything advanced with it as if something goes wrong then fixing it may be difficult or expensive! Additionally make sure to always back up important data before making any changes just in case something does go wrong during unlocking process itself.
How to Check if Your MIUI Device’s Bootloader is Locked or Unlocked
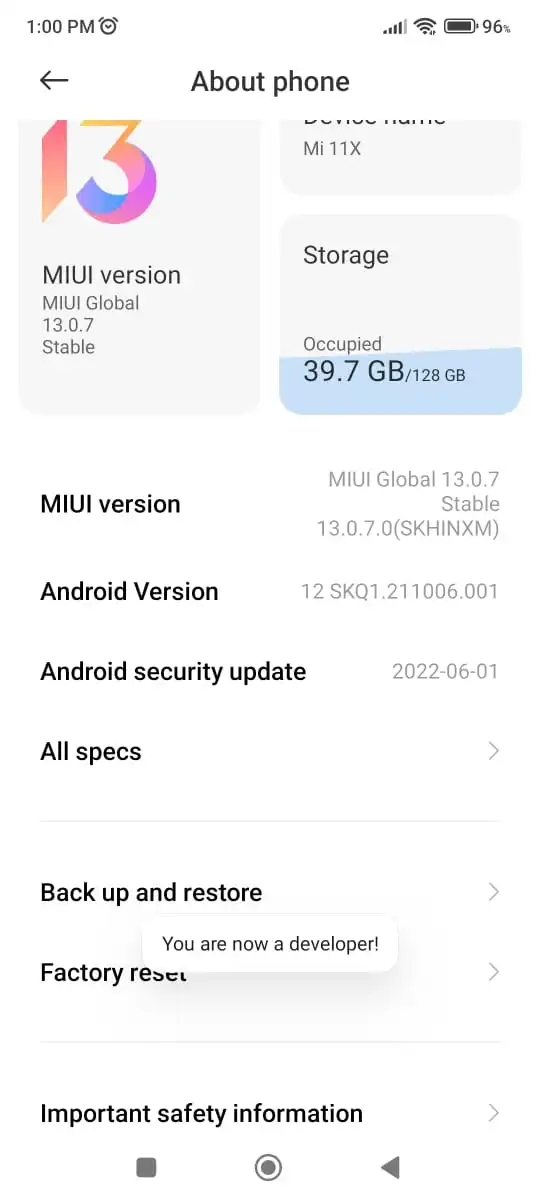
To check the status of your MIUI device’s bootloader, go to Settings > About Phone > MIUI Version (tap 7 times) and you should see a message saying “Now you are a developer.” From there, go to Additional Settings > Developer Options > Mi Unlock Status.
Prerequisites for Unlocking the Bootloader
Before you start the process of unlocking the bootloader on your Xiaomi Redmi phone, there are a few things you’ll need to do:
- Take a full backup of your phone to prevent any data loss during the process.
- Install the Xiaomi USB Drivers on your PC.
- Make sure you have an official MIUI ROM installed on your phone.
To unlock the bootloader on Xiaomi, POCO or Redmi Phones, follow these steps:

Step 1: Enable the developer options and OEM unlock
Enable developer options by heading over to the Settings App of your smartphone, scrolling down, and then tapping on “About Phone”. Then, tap on Build Number (MIUI Version) until you get the “You are now a developer” popup.
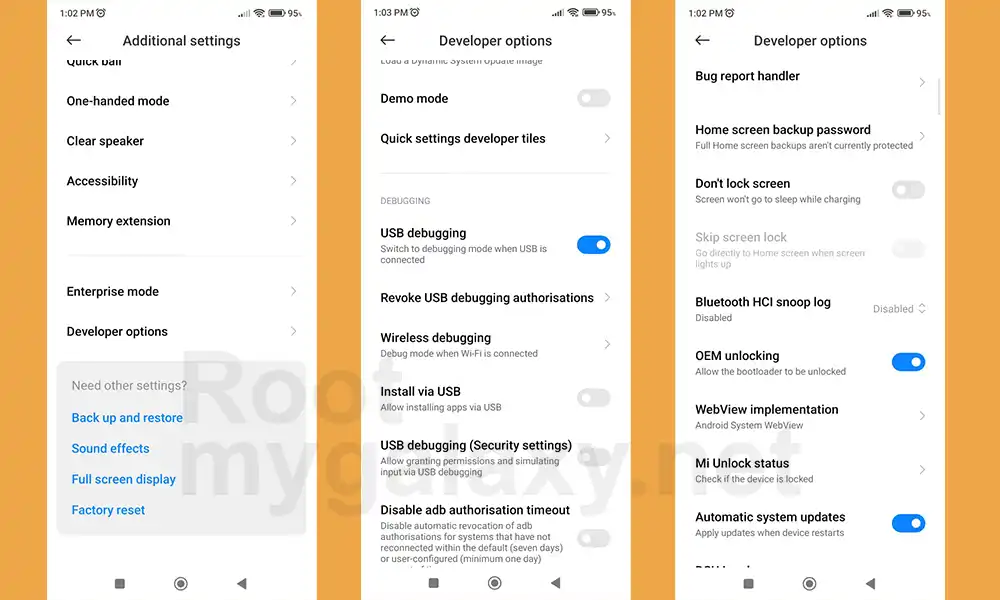
Open Settings -> Additional Settings and then tap on Developer options, you should enable OEM unlocking. Enable USB Debugging as well.
Step 2: Link your Xiaomi/Redmi/POCO with your Mi account
- Confirm your Mi account
- If you haven’t registered to it, head over to Settings -> Mi account or visit the official Mi page for account registration

- Ensure that you’ve inserted the SIM card
- Provide the necessary information to create and link your smartphone to your Mi account
Step 3: Unlock the bootloader on your Xiaomi/Redmi/POCO Phone
- Boot your device into Fastboot mode
- Then, grab the USB cable and connect it to your PC while in Fastboot mode
- Now login to Mi Cloud Server to check whether your device is syn or not. If there are other devices synced with your mi cloud, remove them.
- Download the Mi Unlock Tool and extract the zip file
- Then, run the miflash_unlock.exe file

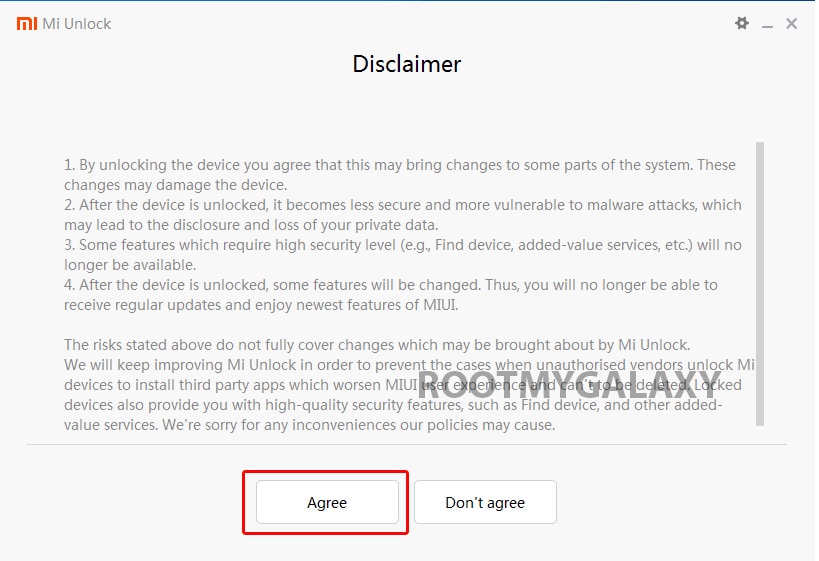
- A new disclaimer page will appear, read it and click Agree
- Now you will be asked to Log in. Log in with your Mi Account, If you don’t have one then Sign UP – CLICK HERE to Sign Up
- Now boot your Phone to Fastboot/Bootloader mode and connect it to your PC via provided USB
- Your device will be shown as connected.
- Note: If a message shown on the screen that your device is not supported by Mi Unlock. Don’t worry. Just click on the Go button to continue
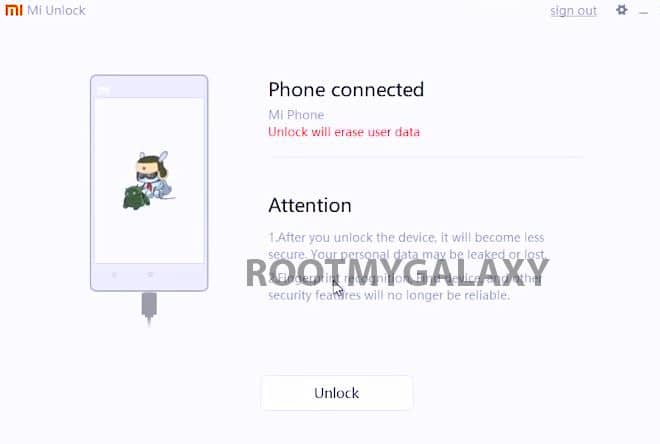
- Now Click On Unlock. It will show some warning, escape that. It will start the unlocking process automatically.

- Once the process is completed, reboot your device. Your device’s bootloader should be unlocked. You can check the bootloader lock status from the settings.
Once the bootloader is unlocked, you’ll be able to proceed with rooting your phone and installing custom ROMs. Just be careful to follow the instructions carefully and take all necessary precautions to avoid damaging your phone or software. Good luck!
