Samsung Galaxy S10 Plus has received the Pixel Experience ROM. If you are a fan of Pixel UI or vanilla stock Android’s look, then this ROM is for you. It is a very lightweight and fast ROM. It is based on Google’s Android 10 mobile OS.
We would like to thank zunaid321 , Member over Xda for developing and sharing the Android 10-based Pixel Experience ROM For Samsung Galaxy S10 Plus. According to the developer, the ROM is very stable and can be used as a daily driver. As of now no bugs has been listed by the developer.
Now follow the guide to Install Pixel Experience Android 10 ROM On Samsung Galaxy S10 Plus (Android 10). If you want more information about the ROM, then visit the Official Xda thread here
Table of Contents
Pre-Requirements
- Make sure the bootloader on your device is unlocked and your device is rooted and you have a custom recovery installed.
- Make sure your device has more than 50% battery.
- Make sure you have taken a backup of your important data. Now proceed To Install Havoc OS Android 10 ROM On your Galaxy device
Disclaimer
RootMyGalaxy.net is not responsible for any damage happened to your device(s) while following this guide, proceed at your own risk.
Downloads
- Download the Android 10 Pixel Experience Android 10 ROM
[su_highlight background=”#78ffb1″ color=”#16181b”] Note: If the download link is broken, check the development page and download the newer version from there [/su_highlight]
- Download Gapps
- Download latest Magisk(If you want root access)
Other Famous Custom ROM For the Device: List of Best Custom ROM for Samsung Galaxy S10 Plus
Steps To Install Pixel Experience Android 10 ROM On Samsung Galaxy S10 Plus | Android 10 Update

- Make sure your device is rooted and have the latest TWRP recovery installed. (Check the Pre-Requirement Section Above)
- First, download the files from the above link and extract them
- Now transfer the downloaded files to the internal storage of your device.
- Now reboot to the TWRP recovery
- Take a nandroid backup by selecting the option from the home screen and then your data and cache from the recovery menu.
- Now return to the main menu of TWRP and wipe cache, data, and system before flashing the ROM

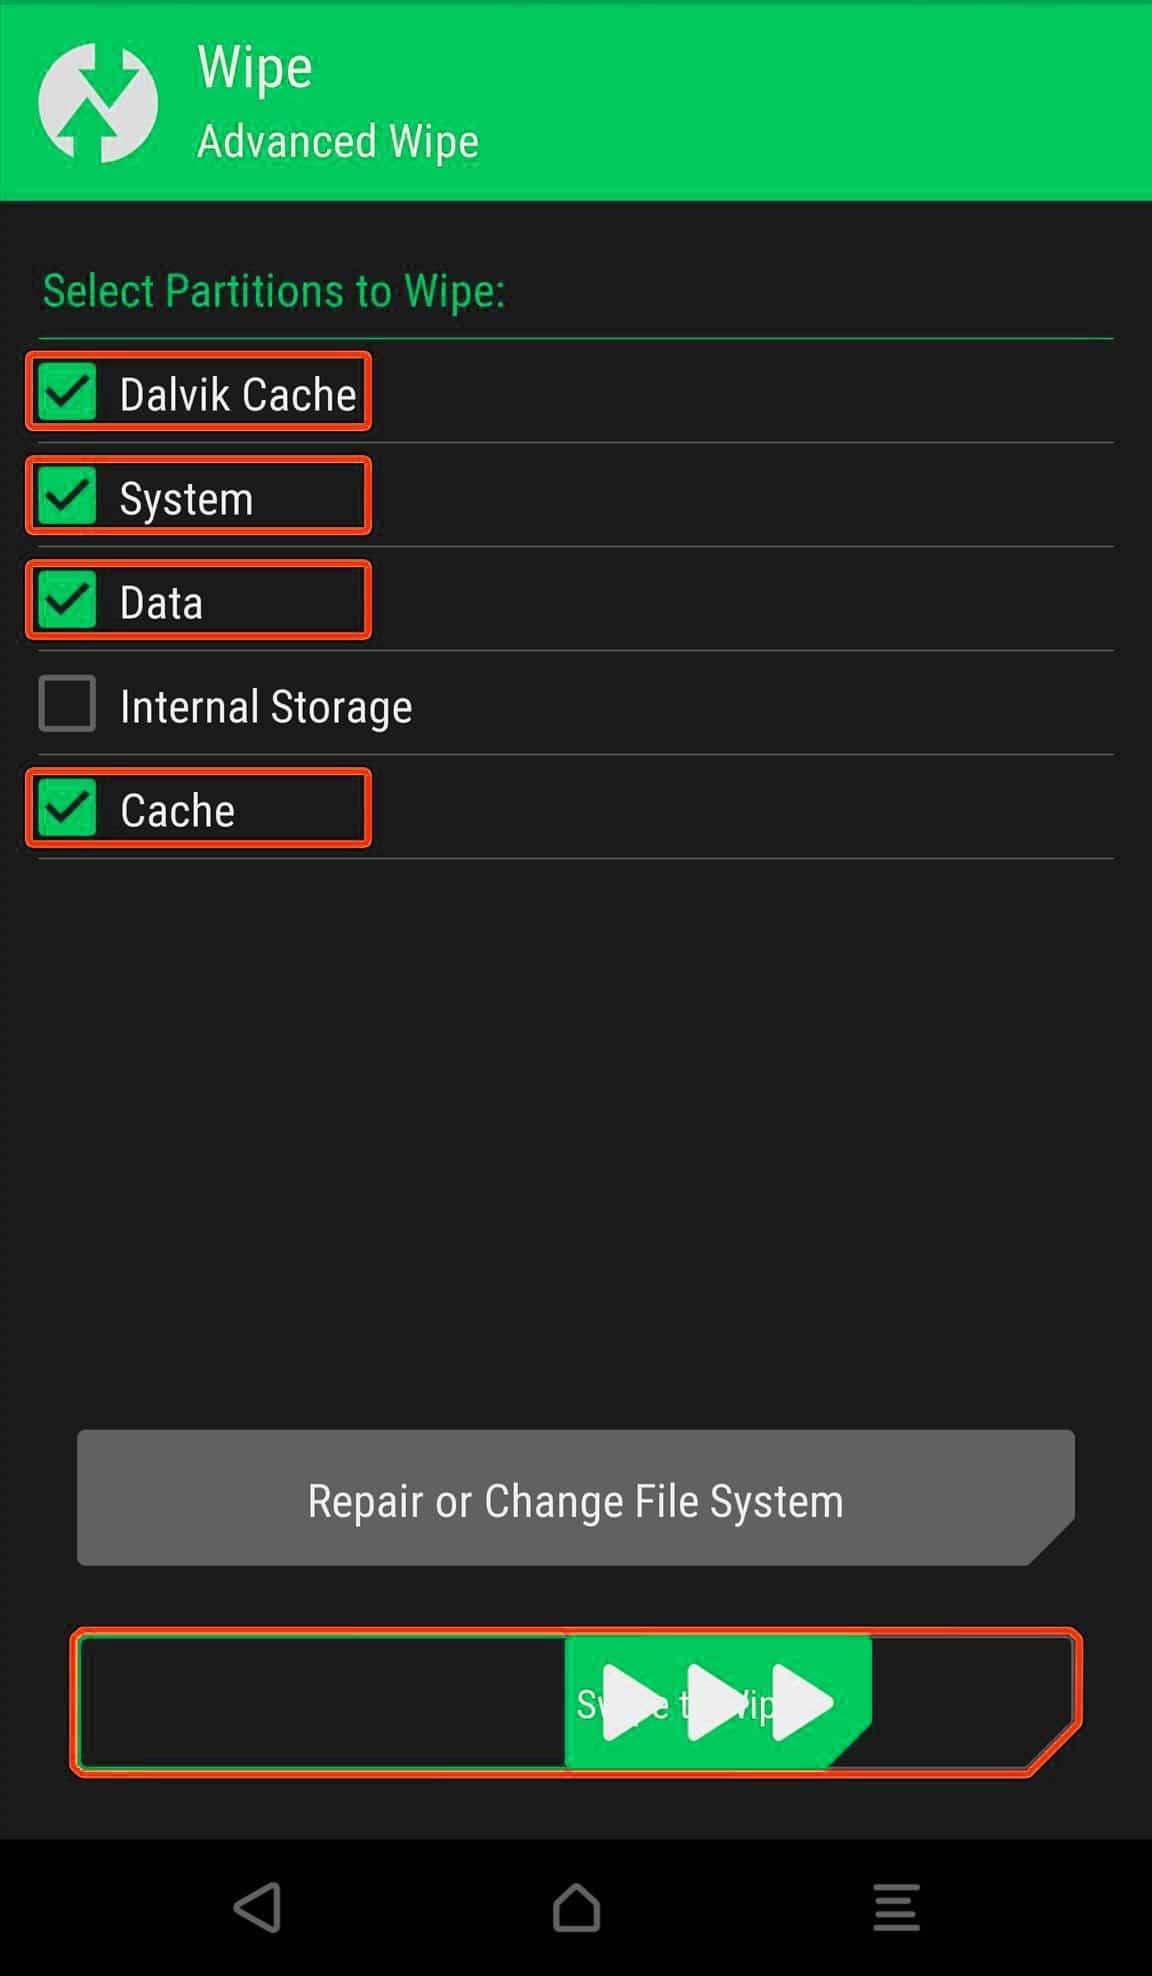
- In order to Wipe data: Go to Wipe —> Advanced Wipe and select Dalvik/ART cache, cache, System, Vendor, and Data and then swipe to wipe. (Don’t select the internal storage)
- Now return to the main menu of TWRP again and install the ROM which is just a .zip file
- Go to Install -> Install Zip > ROM File (.zip)

- Next flash the Gapps file like custom ROMs
- Last but not least, flash Magisk (optional) if you want to root (not recommended as all devices have different methods)
Once the flashing process is completed, reboot your phone and you will be booted into Pixel Experience ROM Based on Android 10. If you have any doubts regarding this process, feel free to comment below.
