The Android world is full of fun and exciting possibilities that you can customize and enjoy on your smartphone. The custom fonts are one of them as you’ll have the option to change the fonts on any Android device. Some OEMs offer apps like the Themes App for changing fonts directly while the other option is to use third-party platforms to add custom fonts. In this article, you’ll get to know how you can download and install Comic Sans Font on your Android device easily. This method will require root access with Magisk installed. In case you don’t have root access, you can look up for it on the Themes App and install it directly.
Download Comic Sans Font on your Android smartphones
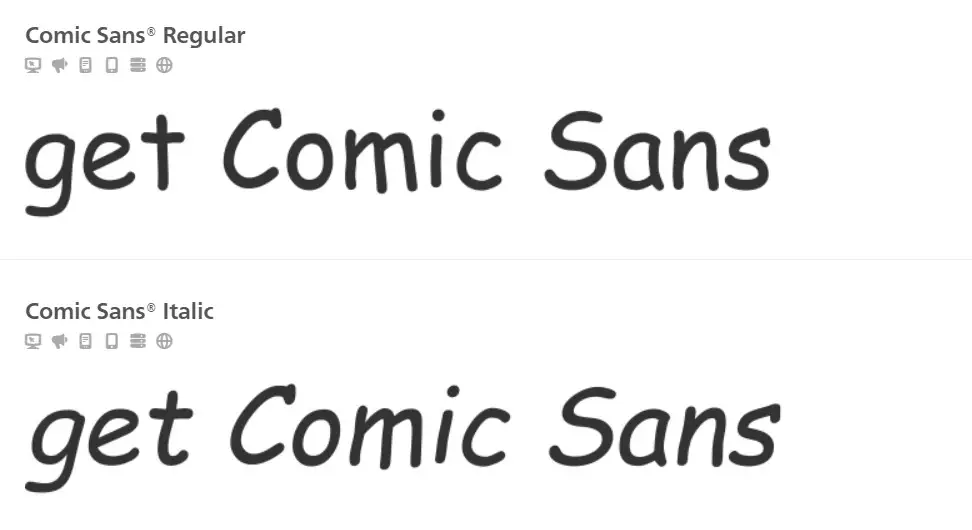
The Comic Sans Font has an interesting history as it used to be heavily criticized if it was used in formal documents. Due to the comic design, the widespread use of the Comic Sans Font was often criticized but over time, it has become one of the most popular fonts on Android devices.
You can easily install this font using Magisk. All you’ll need to do is flash the font ZIP file in Magisk and then reboot the device. Once the device has rebooted, the font will start appearing in the fonts section. You’ll be able to apply the font directly from the settings once you’ve flashed the file. Android users who don’t have root access can search for the “Comic” name in the themes app.
How to install Comic Sans Font on your Android smartphones
- Download the font zip file from the download link mentioned above
- Open the Magisk Manager on your smartphone
- Head over to the Modules section and tap on the “+” section

- After that, navigate to the font ZIP file that you downloaded earlier
- The flashing will begin
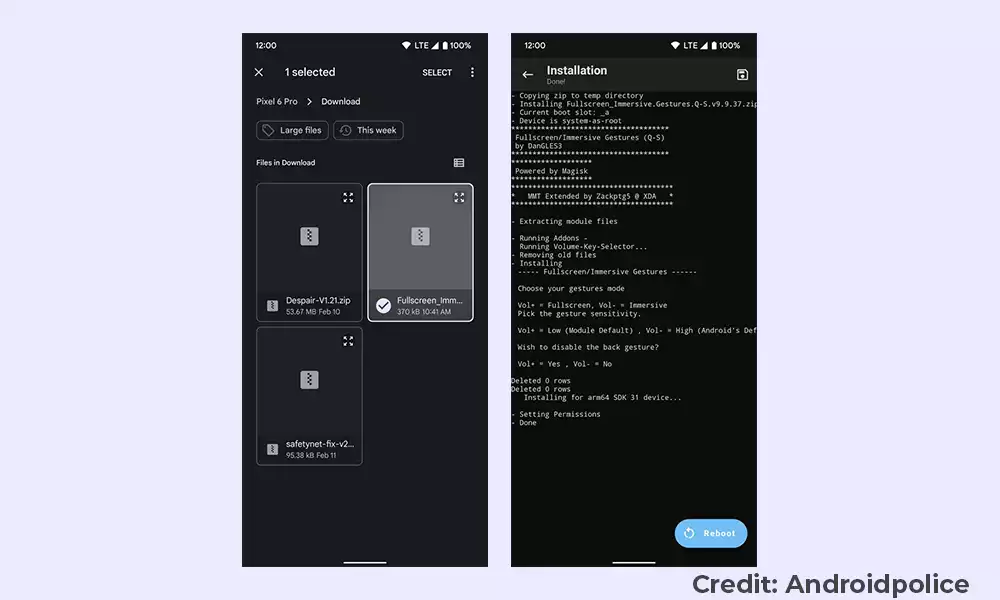
- Once it is done, you should reboot your smartphone
- Once rebooted, apply the Comic Sans Font from your smartphone’s display settings
