Update Nextbit Robin To Resurrection Remix Pie (Android 9.0) || RR 7.0: This ROM build is available for Nextbit Robin. The Custom ROM is shared on Xda by Anierin Bliss. If you want to know more about Resurrection Remix Android 9.0 Pie For Nextbit Robin, just follow the guide given here. The available ROM file name is large is size so download via wifi.
The Android 9.0 Pie is fairly a new version of the Google labs. With the release of new Android 9.0 Pie, the parallel thing that happens is the development of the Custom ROM which essentially acts as a wrapper to the underlying Android version. The Official Resurrection RemixExtended Pie on Nextbit Robin based on Android 9.0 Pie is packed with new Wallpaper Themes, AutoFill, Redesigned Power Menu, Adaptive Icons, Picture -In- Picture Mode, Google Play Protect and 2X Boot Time, new Shutdown and boot Animation, Pixel 3 Launcher, Round Statusbar Icons, and Settings. Follow the below step by step guide to install Resurrection Remix ROM on Nextbit Robin (Android 9.0 Pie).
Remember, the available ROM is an unofficial build. It is developed by some third party developers. The ROM is in its initial stage so there may be few bugs available which will be fixed in the coming updates. It is a very clean ROM which is very close to Stock android with some extra useful features like previous CM or Lineage Os ROMs.
Table of Contents
Pre-Requirements:
- Make sure the bootloader on your device is unlocked and your device is rooted and you have a custom recovery installed.
- Make sure your device has more than 50% battery.
- Make sure you have taken a backup of your important data. Now proceed To Install Lineage OS 15.1 On Nextbit Robin.
Downloads
- Download Resurrection Remix 9.0 (Link removed by uploader)
- Download GApps For Resurrection Remix 9.0 ROMs
- Download latest Magisk Android Pie | Android 9.0 (If you want root access)
How to Install Resurrection Remix Android 9.0 Pie on Nextbit Robin

- Make sure your device is rooted and have the latest TWRP recovery installed. (Check the Pre-Requirement Section Above)
- First, download the files from the above link and extract them
- Now transfer the downloaded files to the internal storage of your device.
- Now reboot to the TWRP recovery by holding your power and volume down buttons together for a few seconds.
- Take a nandroid backup by selecting the option from the home screen and then your data and cache from the recovery menu.
Guide: How To Create & Restore Nandroid nitrogenkup on Nextbit Robin
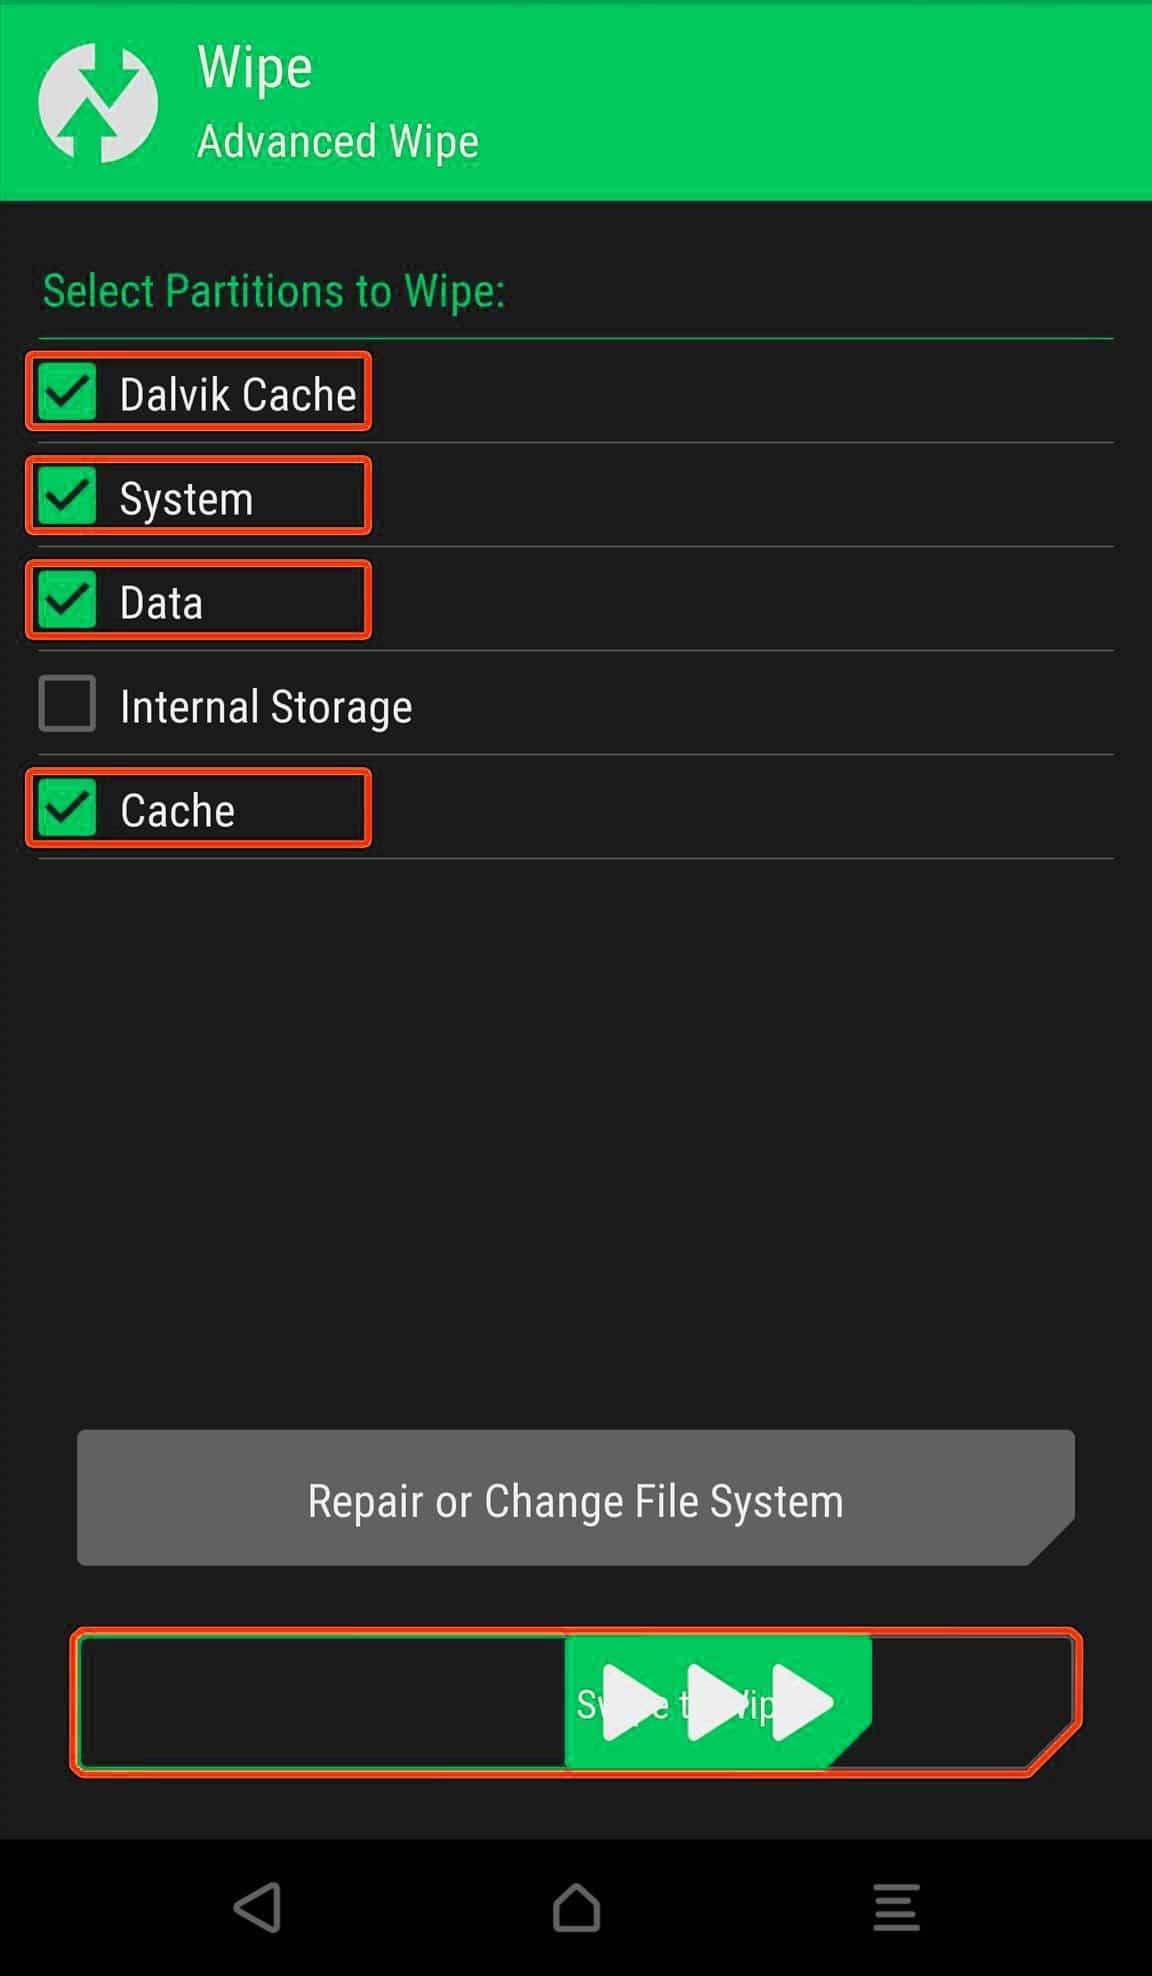
- Now return to the main menu of TWRP and wipe cache, data, and system before flashing the ROM

- In order to Wipe data: Go to Wipe —> Advanced Wipe and select Dalvik/ART cache, cache, System, Vendor, and Data and then swipe to wipe. (Don’t select the internal storage)
- Now Return to the main menu of TWRP again and install the GSI ROM which is just a system image.
- Go to Install -> Install Zip -> select the ROM Zip file

- Next flash the Gapps file like custom ROMs
- Last but not least, flash Magisk (optional) if you want to root (not recommended as all devices have different methods)
Using ADB and fastboot
- Download and install ADB and fastboot on your PC.
- Now transfer the file (GSI system .img) to the ADB folder
- Connect your device to PC and boot your device into bootloader mode.
- Now Open command windows there or Windows power shell and issue the following command
"fastboot flash system <image name>.img"
Once the flashing process is completed, reboot your phone and you will be booted into Resurrection Remix Based on Android 9.0 Pie. If you have any doubts regarding this process, feel free to comment below.
