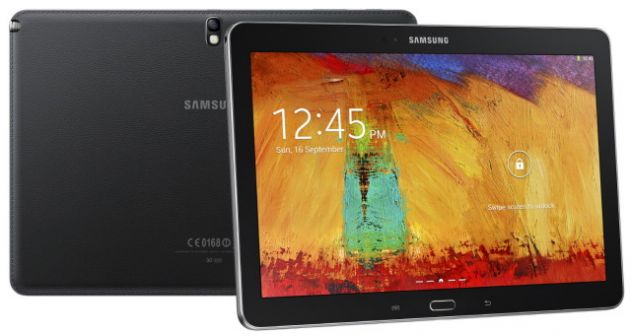
The Official Lineage OS 14.1 For Galaxy Note Pro 12.2 v1awifi is now available: Hello friends!! Today, in this post, we will be discussing the latest Lineage OS 14.1 and how you can easily download and install it on your Galaxy Note Pro 12.2. If you have already used a custom ROM before, then you must already be comfortable with it but if you have never had any experience using custom ROMs before, then this post will give you enough information that you will feel comfortable installing a custom ROM. Custom ROMs come with a lot of benefits such as giving you options to tinker with the settings, customize the options, delete the bloatware, and get many more features than the firmware it is based on. If you happen to be a Galaxy Note Pro 12.2 user who is interested in installing Lineage OS 14.1, then you can do so by following the guide mentioned below.
Lineage OS or formerly referred to as CyanogenMod is easily one of the biggest and most popular lines of Custom ROMs that are available for Android platform. Time after time they have managed to come up with amazing custom ROMs which has helped them get to the top. The latest version of Lineage OS termed Lineage OS 14.1 was recently released officially and this new custom ROM is based on Android 7.1 Nougat Source Code. It not only comes with the features of Android 7.1 Nougat but it also comes with some extra customizable options.
Galaxy is easily one of the most popular smartphone series available for Android users. It has some of the best devices that you can get. It comes with a 12.2-inch display screen with a resolution of 2560x1600p, Snapdragon 800 processor, 3 GB RAM, 32 GB/64 GB internal storage, and a non-removable 9500mAh battery. It runs on Android 4.4 KitKat, and its other features include Accelerometer, Wi-Fi, Wi-Fi Direct, Bluetooth 4.0, USB 3.0, GPS, A-GPS, and more.
Table of Contents
About Android 7.1.2 Nougat (LineageOS 14.1):
The Android 7.1.2 Nougat Update is an incremental update that which comes with a number of bug fixes and optimizations. All the features from Android 7.0 and 7.1 are available in Android 7.1.2 Nougat. The performance and system stability is much improved with the latest update. One of the silent features introduced in 7.1.2 is fingerprint gestures
[su_heading size=”18″ align=”left” class=”Bold”]Related Posts[/su_heading]
- [Download Links Added] Official Lineage OS 14.1.0 Device List | All Android Devices (Android 8.0)
- [Official List] Android Oreo Device List- List of the devices which will get official Android 8.0 update
- Top 5 Best Nintendo 3Ds Emulators for Android, Windows and Mac
- Top 50 Must Have Root Apps For Android 2017
- 5 Best Text Editor Apps for Android
- Top 5 Best Texting Apps For Android 2017
- Enable root for apps on lineage Os (Supersu zip)
Pre-Requirements
- Make sure the bootloader on your device is unlocked and your device is rooted and you have a custom recovery installed.
- Make sure your device has more than 50% battery.
- Make sure you have taken a backup of your important data.Now proceed To Install Official Lineage OS 14.1 On Fairphone 2.
Disclaimer
RootMyGalaxy.net is not responsible for any damage happened to your device(s) while following this guide, proceed at your own risk.
Download Official Lineage OS 14.1 For Galaxy Note Pro 12.2
- Official Lineage OS 14.1 For Galaxy Note Pro 12.2
- Download Official GApps For Official Lineage OS 14.1 ROMs
- Download latest Magisk v13.5 (If you want root access)
Steps To Install Official Lineage OS 14.1 On GALAXY NOTE PRO 12.2 | Android 7.1.2 Nougat Update

- Make sure your device is rooted and have the latest TWRP recovery installed. (Check the Pre-Requirement Section Above)
- First, download the files from the above link.
- Now transfer the downloaded files to the internal storage of your device.
- Now reboot to the TWRP recovery by holding your Armor and volume down buttons together for a few seconds.
- Take a backup by selecting the option from the home screen and then your data and cache from the recovery menu.
- Now select install and then browse for the downloaded ROM file and then select it.Next flash the Gapps file and then Magisk (optional).
- Once the flashing process is completed, reboot your phone and you will be booted into Android Oreo 8.0.
If you have any doubts regarding this article, feel free to comment below.
Note: Images used in this posts are not owned by us and are the properties of respective persons